Introduction
If you’ve been customizing your WordPress site directly through your theme files, you might be setting yourself up for a frustrating surprise. Imagine spending hours perfecting your site’s design, tweaking colors, adjusting layouts, and adding custom functionality, only to have it all disappear with the next theme update. This nightmare scenario happens to countless WordPress users who don’t know about one of the platform’s most valuable features: child themes.
Don’t worry, though, creating a WordPress child theme isn’t rocket science, and once you understand the concept, you’ll wonder how you ever managed without one. In this guide, we’ll walk through everything you need to know about WordPress child themes, from understanding what they are to creating your first one.
What Exactly Is a WordPress Child Theme?
Think of a child theme as a safety net for your customizations. In simple terms, a WordPress child theme is a separate theme that inherits all the functionality, features, and styling of another theme (called the parent theme) while allowing you to make modifications without touching the original theme files.
When you activate a child theme, WordPress first looks at the child theme files for any customizations. If it doesn’t find what it’s looking for there, it automatically falls back to the parent theme. This inheritance system means you get the best of both worlds: all the original theme’s features plus your custom modifications.
Here’s a real-world analogy: imagine you’re renting an apartment (the parent theme). Instead of painting the walls or modifying the apartment directly, which you’d lose when you move out, you create a separate space (child theme) where you keep all your personal touches and decorations. The apartment owner can renovate and update their space without affecting your items.
Why WordPress Child Themes Are Essential (Not Optional)
Many WordPress beginners think child themes are just for developers or advanced users. This couldn’t be further from the truth. Here’s why every WordPress user should be using child themes:
Protection Against Update Disasters
The biggest reason to use WordPress child themes is update protection. When theme developers release updates, they can include security patches, bug fixes, or new features. WordPress will overwrite your theme files completely. Every single customization you’ve made directly to the theme files will vanish.
Without a child theme, updating means choosing between:
- Keeping your customizations but missing out on important updates
- Getting the latest features but losing all your hard work
With a child theme, you never have to make this choice.
Safe Experimentation Environment
WordPress child themes give you the freedom to experiment without fear. Want to try a different header layout? Test new color schemes? Add custom functionality? You can do all of this knowing that if something breaks, your original theme is completely untouched.
Faster Loading Times
This might surprise you, but child themes can improve your site’s performance. Since child themes only contain the files you’ve modified, WordPress has fewer files to process. Additionally, you can remove unnecessary code from the parent theme without actually editing the original files.
Better Organization
WordPress child themes help keep your customizations organized and documented. Instead of hunting through dozens of theme files to remember what you changed, all your modifications are contained in one clean, separate location.
Professional Development Practices
If you ever work with developers or plan to hire one, having your customizations in a WordPress child theme makes their job much easier (and potentially less expensive). They can see exactly what’s been modified without digging through the entire parent theme.
When Should You Create a WordPress Child Theme?
The short answer is: before you make any customizations to your theme. But here are some specific scenarios where child themes are particularly important:
- Before customizing CSS: Even simple color changes should go in a child theme
- Adding custom functions: Any PHP modifications need child theme protection
- Modifying template files: Layout changes require child theme safety
- Before hiring developers, professionals will expect to work with child themes
- When using premium themes, expensive themes get frequent updates that would wipe out customizations
How to Create a WordPress Child Theme (Step by Step)
Creating a WordPress child theme is simpler than you might think. You only need two files to get started, and the whole process takes less than 10 minutes.
Step 1: Create the Child Theme Folder
First, you need to create a new folder for your child theme. You can do this through your hosting control panel’s file manager, FTP, or any file management method you prefer.
Navigate to your WordPress installation directory, then go to: /wp-content/themes/
Create a new folder with a descriptive name. The naming convention is typically: parenttheme-child
For example, if your parent theme is called “Twenty Twenty-Four,” you might name your child theme folder: twentytwentyfour-child
Step 2: Create the style.css File
Inside your child theme folder, create a new file called style.css. This file needs to contain specific information in the header comment so WordPress recognizes it as a child theme.
Here’s the basic template:
/*
Theme Name: Twenty Twenty-Four Child
Description: Child theme of Twenty Twenty-Four
Author: Your Name
Template: twentytwentyfour
Version: 1.0.0
*/

/* Add your custom CSS below this line */
Important notes about the header:
- Theme Name: This can be anything you want; it’s what appears in your WordPress admin
- Template: This must exactly match the folder name of your parent theme (case-sensitive)
- Description and Author: These are optional but helpful for organization
Step 3: Create the functions.php File
Next, create a functions.php file in your WordPress child theme folder. This file is crucial for properly loading the parent theme’s styles and adding your custom functions.
Here’s the essential code:
<?php
// Enqueue parent theme styles
function child_theme_enqueue_styles() {
    wp_enqueue_style( 'parent-style', get_template_directory_uri() . '/style.css' );
    wp_enqueue_style( 'child-style', get_stylesheet_directory_uri() . '/style.css', array('parent-style') );
}
add_action( 'wp_enqueue_scripts', 'child_theme_enqueue_styles' );

// Add your custom functions below this line
?>
This code ensures that both the parent theme’s styles and your child theme’s styles load correctly, with your child theme’s styles taking priority.
Step 4: Activate Your WordPress Child Theme
Now comes the exciting part, activating your child theme:
- Go to your WordPress admin dashboard
- Navigate to Appearance > Themes
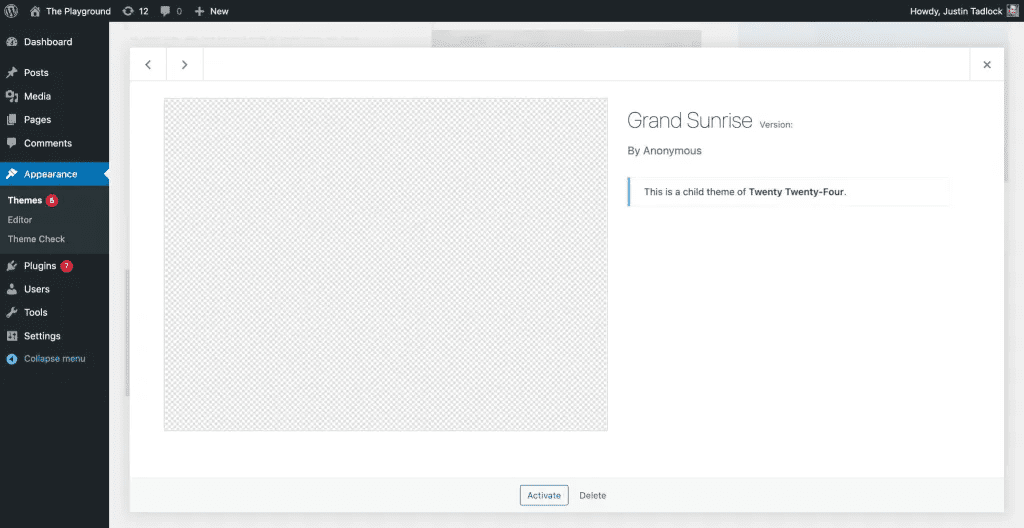
- You should see your new child theme listed alongside other themes
- Click Activate on your child theme
Your site should look the same as before, which means everything is working correctly. The child theme is inheriting all the parent theme’s styling and functionality.
Essential WordPress Child Theme Files and Their Purposes
While style.css and functions.php are the only required files, you might need others depending on your customization needs:
| File | Purpose | When to Use |
| style.css | Custom CSS styles | Always (required file) |
| functions.php | Custom PHP functions | Always (required file) |
| index.php | Main template file | When customizing the main layout |
| header.php | Header template | When modifying the header |
| footer.php | Footer template | When modifying the footer |
| single.php | Single post template | When customizing post layouts |
| page.php | Page template | When customizing page layouts |
| screenshot.png | Theme preview image | For a professional appearance |
Customizing Your WordPress Child Theme
Now that your child theme is active, you can start making customizations safely. Here are some common modifications:
Adding Custom CSS
Simply add your custom styles to the style.css file in your child theme. These styles will override the parent theme styles:
/* Custom header background */
.site-header {
    background-color: #333;
    padding: 20px 0;
}

/* Custom button styles */
.custom-button {
    background: #007cba;
    color: white;
    padding: 10px 20px;
    border-radius: 5px;
}
Adding Custom Functions
Use the functions.php file to add new functionality:
// Add custom post type
function create_custom_post_type() {
    register_post_type('portfolio',
        array(
            'labels' => array(
                'name' => 'Portfolio',
                'singular_name' => 'Portfolio Item'
            ),
            'public' => true,
            'supports' => array('title', 'editor', 'thumbnail')
        )
    );
}
add_action('init', 'create_custom_post_type');
Modifying Template Files
To modify a template file, copy it from the parent theme to your child theme folder, then make your changes:
- Find the file you want to modify in the parent theme folder
- Copy it to your WordPress child theme folder (maintaining the same file name)
- Make your modifications to the copy in your child theme
WordPress will automatically use your modified version instead of the parent theme’s version.
Troubleshooting Common WordPress Child Theme Issues
Even though creating child themes is straightforward, you might encounter a few common issues:
Styles Not Loading Correctly
Problem: Your custom styles aren’t appearing, or the parent theme styles are missing.
Solution: Check your functions.php file to ensure you’re properly enqueuing both parent and child styles.
WordPress Child Theme Not Appearing in Admin
Problem: Your child theme doesn’t show up in the Themes section.
Solution: Verify that your style.css file has the correct header information, especially the Template line.
Site Breaks After Activation
Problem: Your site displays errors or looks broken after activating the WordPress child theme.
Solution: Check for syntax errors in your functions.php file. Remove any closing ?> PHP tags, as they’re unnecessary and can cause issues.
Customizations Not Overriding Parent Theme
Problem: Your CSS changes aren’t taking effect.
Solution: You might need to increase CSS specificity or use! important declarations for stubborn styles.
Best Practices for WordPress Child Theme Development
Keep It Clean and Organized
Don’t just dump all your customizations into the child theme. Organize your CSS with comments, group related functions together, and document your changes.
Use Version Control
If you’re making significant modifications, consider using version control (like Git) to track your changes. This makes it easier to revert problematic modifications.
Test Before Going Live
Always test your WordPress child theme customizations on a staging site before implementing them on your live site.
Document Your Changes
Keep notes about what you’ve modified and why. This helps you (or future developers) understand your customizations later.
Regular Backups
Even with child themes protecting your customizations, regular backups are essential. Back up both your child theme files and your database regularly.
Advanced Child Theme Techniques
Once you’re comfortable with basic child theme creation, you can explore more advanced techniques:
Removing Parent Theme Functionality
Sometimes you want to remove features from the parent theme. You can do this by unhooking actions or filters in your child theme’s functions.php:
// Remove parent theme's custom header
function remove_parent_theme_header() {
    remove_action('wp_head', 'parent_theme_custom_header');
}
add_action('after_setup_theme', 'remove_parent_theme_header');
Adding Custom Post Types and Fields
Child themes are perfect for adding custom functionality that you want to keep regardless of theme updates:
// Add custom fields to posts
function add_custom_meta_boxes() {
    add_meta_box(
        'custom-fields',
        'Custom Fields',
        'custom_fields_callback',
        'post'
    );
}
add_action('add_meta_boxes', 'add_custom_meta_boxes');
Creating Custom Page Templates
You can add completely new page templates to your child theme by creating PHP files with specific naming conventions:
<?php
/*
Template Name: Custom Landing Page
*/

get_header(); ?>

<div class="custom-landing-page">
    <!-- Your custom template code here -->
</div>

<?php get_footer(); ?>
Maintaining Your Child Theme
Creating a child theme isn’t a one-and-done task. Here’s how to maintain it properly:
Regular Updates
Keep your parent theme updated. Since your customizations are safe in the child theme, you can update without worry.
Monitor Performance
Regularly check your site’s performance. Sometimes customizations can slow things down, so monitor loading times and optimize as needed.
Clean Up Unused Code
Periodically review your child theme files and remove any customizations you’re no longer using.
Stay Informed
Follow your parent theme’s development. Sometimes new versions introduce changes that might affect your child theme customizations.
Child Themes and Website Performance
One often overlooked benefit of child themes is their positive impact on website performance:
Reduced File Size
Child themes only contain the files you’ve modified, which means fewer files for WordPress to process.
Better Caching
Since your customizations are separate from the parent theme, caching plugins can more effectively cache your site’s content.
Cleaner Code
Child themes encourage cleaner, more organized code, which can improve loading times and make troubleshooting easier.
Common Child Theme Myths Debunked
Let’s clear up some misconceptions about child themes:
Myth: Child themes are only for developers.
Reality: Anyone can create and use child themes with basic file management skills.
Myth: Child themes slow down your website.
Reality: Properly configured child themes can improve performance.
Myth: You need a child theme for every small change.
Reality: While it’s good practice, minor CSS changes may be acceptable in the Customizer (though child themes are still safer).
Myth: Child themes are complicated to maintain.
Reality: Once set up, child themes require minimal maintenance.
Conclusion
Creating a child theme is one of the smartest decisions you can make as a WordPress site owner. It’s a simple process that provides invaluable protection for your customizations while giving you the freedom to experiment and modify your site without fear.
Remember, the few minutes you spend setting up a child theme now can save you hours of frustration later. Whether you’re making simple color changes or complex functionality additions, child themes ensure your hard work stays safe through theme updates and modifications.
The process might seem intimidating at first, but as we’ve seen, it only requires two files and a few minutes of your time. Once you’ve created your first child theme, you’ll have the confidence and knowledge to customize your WordPress site safely and effectively.
Don’t wait until you’ve already made customizations to create a child theme. Set one up now, before you need it, and enjoy the peace of mind that comes with knowing your customizations are protected. Your future self will thank you for taking this simple but crucial step in your WordPress journey.