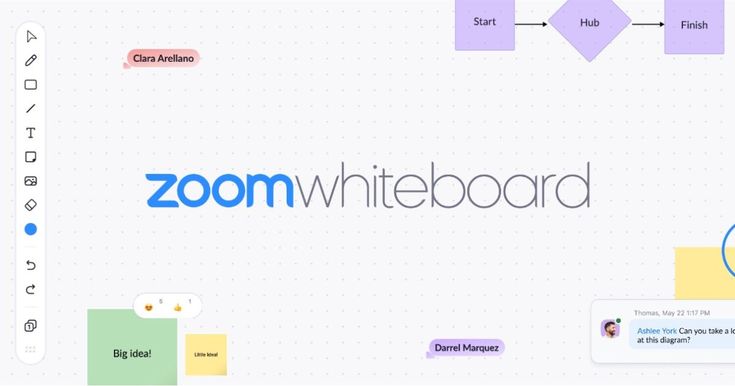
Zoom Whiteboard is like having a digital flipchart that everyone can use simultaneously. It’s perfect for brainstorming sessions, system architecture discussions, user flow mapping, or any time you need to sketch out ideas collaboratively. Let’s walk through how to get it set up and use it effectively.

Understanding Zoom Whiteboard
Think of Zoom Whiteboard as a shared canvas where multiple people can draw, type, and collaborate in real-time. Unlike traditional screen sharing, where only one person controls the content, whiteboards let everyone contribute simultaneously, making them ideal for interactive sessions where ideas flow freely.
Enabling Zoom Whiteboard
Account-Level Setup

Step 1: Access Admin Settings
- Log in to your Zoom web portal at zoom.us
- Navigate to Admin → Account Management → Account Settings
- Go to the Meeting tab
Step 2: Enable Whiteboard Feature
- Scroll to the Whiteboard section
- Toggle ON “Allow users to share whiteboard”
- Choose your sharing permissions:
- Host only: Only the meeting host can start whiteboards
- Hosts and co-hosts: Hosts and co-hosts can start whiteboards
- All participants: Anyone can start a whiteboard
Step 3: Configure Additional Settings
- Auto-save whiteboards: Saves content automatically
- Allow annotation on shared screen: Let people draw over screen shares
- Whiteboard collaboration: Enable multi-user editing
Individual User Setup
For Personal Accounts:
- Go to Settings → Meeting
- Find the Whiteboard section
- Enable Share whiteboard
- Choose collaboration permissions
Starting a Whiteboard Session
Method 1: During a Meeting
From the Meeting Toolbar:
- Click Share Screen
- Select the Whiteboard tab
- Choose New Whiteboard or select an existing one
- Click Share
Quick Access:
- Look for the Whiteboard icon directly in the toolbar (newer Zoom versions)
- Click to instantly start a new whiteboard
Method 2: Outside of Meetings
From Zoom Client:
- Open the Zoom desktop app
- Click Whiteboards in the left sidebar
- Click New Whiteboard
- Start creating, then share via a meeting when ready
From Web Portal:
- Go to zoom.us and log in
- Click Whiteboards in the navigation
- Create new or access existing whiteboards
Whiteboard Tools and Features
Basic Drawing Tools
| Tool | Function | Best For |
| Pen | Free-form drawing | Sketching, signatures, annotations |
| Highlighter | Transparent overlay | Emphasizing text, marking areas |
| Eraser | Remove content | Corrections, cleanup |
| Shapes | Perfect geometric forms | Flowcharts, diagrams, mockups |
| Text | Type text boxes | Labels, notes, structured content |
| Sticky Notes | Digital post-it notes | Brainstorming, categorizing ideas |
Advanced Features
Templates:
- Brainstorming: Mind maps, idea clustering
- Project Planning: Kanban boards, timelines
- Education: Lesson plans, worksheets
- Business: SWOT analysis, process flows
Collaboration Tools:
- Real-time cursors: See where others are working
- Comments: Add contextual feedback
- Version history: Track changes over time
- Export options: PDF, image, or native format
Effective Whiteboard Strategies
For Development Teams
System Architecture Sessions
Setup: Large whiteboard with grid background
Tools: Shapes (rectangles, arrows), text, different colors
Process:
1. Start with high-level components
2. Add connections and data flows
3. Use colors to represent different layers
4. Annotate with technical notes
User Flow Mapping
Setup: Horizontal layout template
Tools: Sticky notes, arrows, text
Process:
1. Map user journey steps with sticky notes
2. Add decision points with diamond shapes
3. Use arrows to show flow direction
4. Color-code different user types
Sprint Planning and Retrospectives
Setup: Kanban or timeline template
Tools: Sticky notes, text, shapes
Process:
1. Create columns (To Do, In Progress, Done)
2. Add user stories as sticky notes
3. Use colors for different priorities
4. Move items as the discussion progresses
For Workshops and Brainstorming
Idea Generation Sessions
Setup: Blank canvas with sections
Tools: Sticky notes, pen, highlighter
Process:
1. Define problem area with a text box
2. Everyone adds ideas via sticky notes
3. Group related ideas together
4. Use a highlighter to mark top priorities
Process Improvement Workshops
Setup: Process flow template
Tools: Shapes, arrows, text, comments
Process:
1. Map the current process with shapes
2. Identify pain points with comments
3. Sketch the improved process below
4. Use different colors for before/after
Managing Whiteboard Collaboration
Setting Up Permissions
During Meeting Setup:
- View only: Participants can see but not edit
- Edit: Participants can add content
- Full control: Participants can modify anything
Real-time Permission Changes:
- Click More (three dots) in the whiteboard
- Select Manage Participants
- Adjust individual permissions as needed
Best Practices for Group Sessions
Before Starting:
- Explain the purpose and goals
- Assign roles (facilitator, timekeeper, note-taker)
- Set ground rules for collaboration
- Test tools with participants
During the Session:
- Use different colors for different people/topics
- Encourage simultaneous contribution
- Regularly save progress (Ctrl+S)
- Use zoom and pan to focus on specific areas
Managing Chaos:
- Designate sections for different people
- Use a “parking lot” area for off-topic ideas
- Regularly organize and clean up content
- Save intermediate versions before major changes
Advanced Whiteboard Features
Integration with Other Tools
Zoom Apps Integration:
- Miro: Advanced whiteboarding capabilities
- Mural: Design thinking templates
- Lucidchart: Professional diagramming
- Conceptboard: Visual project management
Export and Sharing:
- PDF export: Share with non-Zoom users
- Image export: Include in presentations
- Link sharing: Collaborate outside meetings
- Email sharing: Send to stakeholders
Whiteboard Management
Organizing Your Whiteboards:
- Use descriptive names (e.g., “Q3 Architecture Review – 2024”)
- Create folders for different projects
- Tag whiteboards with relevant keywords
- Set up favorites for frequently used boards
Version Control:
- Duplicate whiteboards before major changes
- Use comments to track decision history
- Export snapshots at key milestones
- Maintain a changelog for complex projects
Common Use Cases and Templates
Software Development Scenarios
API Design Sessions
Template: Grid layout with sections
Sections:
– Endpoints (left column)
– Request/Response (middle)
– Error handling (right)
– Notes (bottom)
Bug Triage Meetings
Template: Kanban board
Columns: New, Investigating, In Progress, Testing, Closed
Tools: Sticky notes (one per bug), priority colors
Code Review Discussions
Template: Blank canvas with sections
Sections:
– Code structure (top)
– Issues found (left)
– Suggestions (right)
– Action items (bottom)
Team Collaboration Scenarios
Daily Standup Boards
Template: 3-column layout
Columns: Yesterday, Today, Blockers
Process: Each person adds sticky notes to their row
Project Kickoff Sessions
Template: Mind map or sections
Sections:
– Goals (center)
– Requirements (top)
– Constraints (bottom)
– Timeline (right)
Troubleshooting Common Issues
“Whiteboard Won’t Start”
- Check if the feature is enabled in account settings
- Verify you have proper permissions
- Try refreshing the Zoom client
- Ensure you’re using a supported browser/client version
“Participants Can’t Edit”
- Check sharing permissions in the whiteboard settings
- Verify participants have annotation rights
- Try stopping and restarting the whiteboard share
- Ensure participants are using updated Zoom clients
“Whiteboard Is Laggy”
- Reduce the number of simultaneous editors
- Clear complex drawings and start fresh
- Check the internet connection quality
- Close other resource-intensive applications
“Content Disappeared”
- Check if auto-save is enabled
- Look for the whiteboard in your saved boards
- Try refreshing the whiteboard
- Use version history to recover content
Pro Tips for Effective Whiteboard Sessions
- Start with Structure: Use templates or create sections before inviting collaboration
- Color Coding: Establish color meanings early (red = urgent, blue = ideas, etc.)
- Zoom Controls: Use zoom to focus on specific areas during detailed discussions
- Regular Saves: Save frequently, especially before major changes
- Clean as You Go: Remove outdated content to keep the board focused
- Screenshot Backups: Take screenshots of important stages as backup
- Practice First: Try tools and features before important sessions
- Mobile Considerations: Test how the content looks on mobile devices
Quick Reference: Whiteboard Shortcuts
| Action | Shortcut | Description |
| Select | V | Switch to the pen tool |
| Pen | P | Add a text box |
| Text | T | Add text box |
| Shapes | S | Undo the last action |
| Undo | Ctrl+Z | Redo the last undone action |
| Redo | Ctrl+Y | Zoom into the canvas |
| Save | Ctrl+S | Open the shapes menu |
| Zoom In | Ctrl++ | Zoom out from the canvas |
| Zoom Out | Ctrl+- | Fit the content to the screen |
| Fit to Screen | Ctrl+0 | Fit content to screen |
Measuring Whiteboard Success
Signs of Effective Whiteboard Sessions:
- Active participation from multiple people
- Clear visual organization of ideas
- Concrete outcomes captured visually
- Easy reference back to the content later
- Participants request similar sessions
Areas for Improvement:
- Only one person is contributing most content
- Chaotic, unorganized visual layout
- Technical issues dominate the experience
- Difficulty finding or accessing content later
- Participants were confused by the tools
Wrapping Up
Zoom Whiteboard transforms meetings from passive listening sessions into active collaboration experiences. The key is understanding when to use it, how to set it up properly, and how to facilitate effective group interaction.
Start with simple use cases like brainstorming or basic diagramming, then gradually incorporate more advanced features and templates. Remember, the goal isn’t to create perfect artwork – it’s to enable clear communication and collaborative thinking that leads to better outcomes.
With practice, you’ll find that whiteboard sessions often generate more engagement and better results than traditional presentation-style meetings. The visual, interactive nature helps people think differently and contribute more actively to problem-solving discussions.