Installing NixOS on Hetzner VPS infrastructure creates a robust and highly maintainable server setup tailored to your specific needs. This blog post serves as your comprehensive guide to seamlessly installing NixOS on a Hetzner VPS directly from your local machine, regardless of whether you use macOS, Windows (via WSL), or another Linux distribution. We will leverage powerful tools such as flakes and nixos-anywhere to simplify the installation process and ensure a smooth setup.
Requirements for Installing NixOS on Hetzner VPS
To get started, here’s what you’ll need:
- A Linux-based computer with system (Ubuntu 24.04 is used in this guide).
- Nix already installed on your local machine (refer to our Nix installation guide if needed).
- Root privileges on your local machine to execute commands.
Tools We’ll Use
- nixos-anywhere: A tool for remote installation of NixOS.
- disko: A utility for configuring disk storage.
https://nestnepal.com/blog/migrate-from-jenkins-to-github-actions/
Step-by-Step Guide to Install NixOS on Hetzner VPS
Step 1: Prepare Your Setup
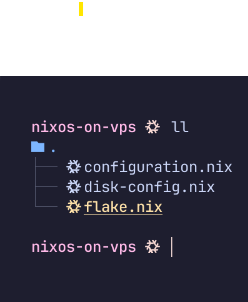
Begin by organizing your files. Create a directory on your local machine named my-nixos-vps and include three crucial files:
- flake.nix
- configuration.nix
- disk-config.nix.

flake.nix:
This file directs the setup process by specifying where to find necessary tools and how to configure the system.
{
inputs = {
nixpkgs.url = "github:nixos/nixpkgs/nixpkgs-unstable";
disko.url = "github:nix-community/disko";
disko.inputs.nixpkgs.follows = "nixpkgs";
};

outputs = { nixpkgs, disko, ... }: {
nixosConfigurations.wolf = nixpkgs.lib.nixosSystem {
system = "x86_64-linux";
modules = [
disko.nixosModules.disko
./configuration.nix
./disk-config.nix
];
};
};
}
Note: We have used wolf as the reference name. Replace wolf with your preferred hostname.
configuration.nix:
Configure system settings such as enabling internet access and allowing remote login.
{ modulesPath, config, lib, pkgs, ... }: {
imports = [
(modulesPath + "/installer/scan/not-detected.nix")
(modulesPath + "/profiles/qemu-guest.nix")
./disk-config.nix
];

boot.loader.grub = {
efiSupport = true;
efiInstallAsRemovable = true;
};

services.openssh.enable = true;

environment.systemPackages = [
pkgs.curl
pkgs.gitMinimal
];

users.users.root.openssh.authorizedKeys.keys = [
"Your public SSH key"
];

system.stateVersion = "23.11";
}
disk-config.nix:
Define how the storage (hard disk) should be set up.
{ lib, ... }:
{
disko.devices = {
disk.disk1 = {
device = lib.mkDefault "/dev/sda";
type = "disk";
content = {
type = "gpt";
partitions = {
boot = {
name = "boot";
size = "1M";
type = "EF02";
};
esp = {
name = "ESP";
size = "500M";
type = "EF00";
content = {
type = "filesystem";
format = "vfat";
mountpoint = "/boot";
};
};
root = {
name = "root";
size = "100%";
content = {
type = "lvm_pv";
vg = "pool";
};
};
};
};
};
lvm_vg = {
pool = {
type = "lvm_vg";
lvs = {
root = {
size = "100%FREE";
content = {
type = "filesystem";
format = "ext4";
mountpoint = "/";
};
};
};
};
};
};
}
Step 2: Install NixOS
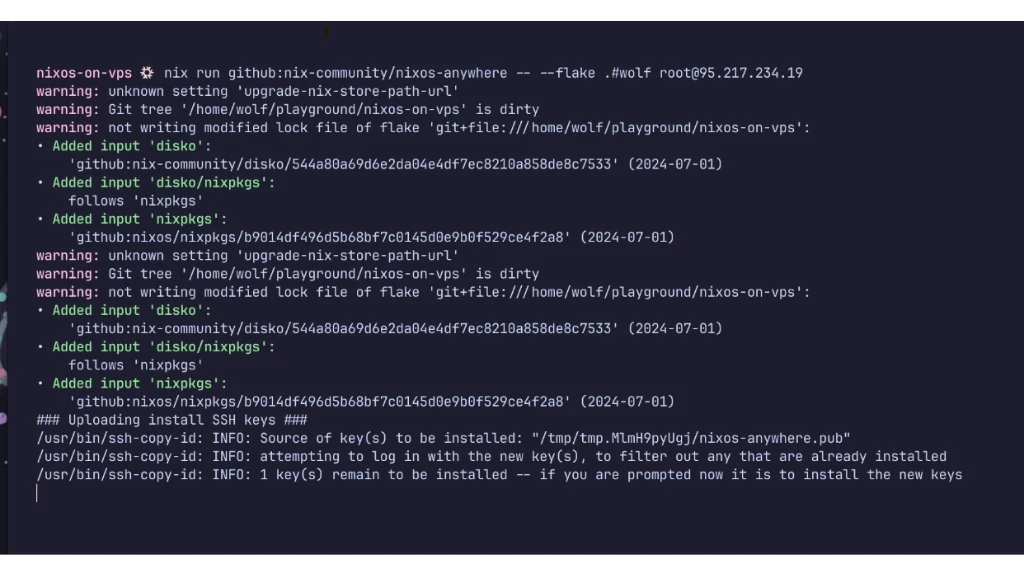
Execute the following command in your terminal to initiate the NixOS installation on your Hetzner VPS:
nix run github:nix-community/nixos-anywhere -- --flake .#wolf root@<server-ip>
Note: Replace <server-ip> with your VPS’s IP address.
This command will install the base NixOS system on your Hetzner VPS.
Step 3: Access Your Server
After installation completes, access your server via SSH:
ssh root@<server-ip>
Congratulations! You now have a successfully functional NixOS installation on your Hetzner VPS.
Additional Tips
- Installing NixOS on a Hetzner VPS Mac: The process remains similar on macOS; ensure SSH is configured correctly.
- NixOS on Windows: Use WSL to follow Linux-specific commands.
- Customization: This guide provides a basic setup; customize further based on your requirements.
- Exploring NixOS: Dive into NixOS’s unique features like declarative configurations and reproducibility.
- nixos-anywhere: Simplifies deployment, making NixOS installation on remote servers straightforward.
Conclusion
Installing NixOS on a Hetzner VPS may seem daunting, but with this guide, it’s straightforward. By organizing files, configuring your system, and executing installation commands, you can efficiently set up your VPS. For more in-depth guides and tips, visit our blog. Have questions? Drop a comment below!
Frequently Asked Questions
Can I install NixOS on a Hetzner VPS using a Mac?
Yes, you can install NixOS on a Hetzner VPS using a Mac. Connect to your VPS via SSH from your Mac’s terminal and follow the NixOS installation guide.
- Create a VPS on Hetzner: Log in to Hetzner Cloud and set up a new VPS.
- Access the VPS: Use SSH from your Mac’s terminal (ssh root@your_vps_ip).
- Install NixOS: Follow the NixOS installation guide.
Is it possible to use NixOS on Windows?
Yes, you can use NixOS on Windows through virtualization or dual-booting. The two main methods are:
- Virtual Machine: Install a VM software like VirtualBox or VMware on Windows and run NixOS inside the virtual machine.
- WSL2 (Windows Subsystem for Linux): Install WSL2 and then install Nix package manager, which allows you to use many NixOS features within Windows.
Do you have an example of NixOS installation on a Hetzner VPS?
Once NixOS is installed on your Hetzner VPS, explore NixOS’s declarative system configuration approach. Use configuration files like flake.nix, configuration.nix, and disk-config.nix to manage your system setup efficiently. This allows you to version control your configuration and easily reproduce.
What is nixos-anywhere?
Nixos-anywhere is a tool that simplifies the installation of NixOS on remote servers. It uses flake inputs to configure and deploy NixOS systems, making it easier to manage and reproduce server configurations.
Learn more: What is 304 Status Code and How to fix it?

