Esewa payment integration in Node.js application offers a popular Nepalese payment gateway for users to perform transactions. In this guide, we will learn how to integrate Esewa payment using Node.js. By Esewa payment integration in your Node.js application using the Express.js framework, you can seamlessly handle payments, enhance user experience, and ensure that your online business transactions are reliable and secure.
Node.js is an open-source, cross-platform JavaScript runtime environment that allows developers to build server-side and network applications using JavaScript. Similarly, Express.js is an efficient and flexible web framework for Node.js that simplifies the development of web applications and APIs. When it comes to payment integration, Express.js offers a streamlined approach to handle payment processing, secure transactions, and manage callback URLs.
Requirements
- Node.js installed on your machine.
- Familiarity with Express.js framework.
- Basic understanding of JavaScript.
Steps for Esewa Payment Integration in Node.js
Here is the step by step process on how to integrate Esewa with Node.js using Express.js framework.
Step 1: Initialize a new Node.js project using npm package
Write the following command in your terminal to initialize Node.js project with npm package.
npm init -y
Step 2: Set up a development Environment using Nodemon
Nodemon is a tool in Node.js based applications that automatically restarts the node application when file changes in the directory are detected. It helps in automatically restarting the server on file changes.
npm install -d nodemon
Again, you have to add dev int the script keys inside package.json,
"scripts": {
"dev": "nodemon index.js"
},
Step 3: Set up backend server with Express js
In order to use Express framework, first install Express using npm command:
npm install express
Now, write the following code inside new file name “index.js“. We use Express.js to create a simple server that listens on port 3000.
const express= require("express")
const app=express()
app.use(express.json())
app.listen(3000, ()=>{
    console.log("Server in port 3000")
})

What is 304 Status Code: How to Fix It?
Step 4: Setup the Route
Setting up the route is another essential step while setting up the project as it helps to handle requests between client and server side. Here, we define three routes: /pay-with-esewa for initiating payments, /success for handling successful payments, and /failure for handling failed payments.
app.get("/pay-with-esewa",(req,res,next)=>{
})

app.get("/success",()=>{
//handle success callback
})

app.get("/failure",()=>{
//handle failure callback
})
Step 5: Set up the Payment Form
In this code, the HTML form includes all necessary parameters and a cryptographic signature to ensure secure and reliable payment processing. In the “/pay-with-esewa” route, we generate a form that submits payment details to Esewa.
app.get("/pay-with-esewa",(req,res,next)=>{
    let order_price=req.query.price
    let tax_amount=0
    let amount=order_price
    let transaction_uuid=generateRandomString()
    let product_code="EPAYTEST"
    let product_service_charge = 0
    let product_delivery_charge = 0
    let secretKey="8gBm/:&EnhH.1/q"
    let signature=generateSignature(`total_amount=${amount},transaction_uuid=${transaction_uuid},product_code=${product_code}`,secretKey)


    res.send(`
    <body>
        <form action="https://rc-epay.esewa.com.np/api/epay/main/v2/form" method="POST">
            <input type="text" id="amount" name="amount" value="${amount}" required>
            <input type="text" id="tax_amount" name="tax_amount" value ="${tax_amount}" required>
            <input type="text" id="total_amount" name="total_amount" value="${amount}" required>
            <input type="text" id="transaction_uuid" name="transaction_uuid" value="${transaction_uuid}" required>
            <input type="text" id="product_code" name="product_code" value ="EPAYTEST" required>
            <input type="text" id="product_service_charge" name="product_service_charge" value="${product_service_charge}" required>
            <input type="text" id="product_delivery_charge" name="product_delivery_charge" value="${product_delivery_charge}" required>\
            <input type="text" id="success_url" name="success_url" value="http://localhost:3000/success" required>
            <input type="text" id="failure_url" name="failure_url" value="http://localhost:3000/failure" required>
            <input type="text" id="signed_field_names" name="signed_field_names" value="total_amount,transaction_uuid,product_code" required>
            <input type="text" id="signature" name="signature" value="${signature}" required>
            <input value="Submit" type="submit">
         </form>
    </body>
    `)
    })

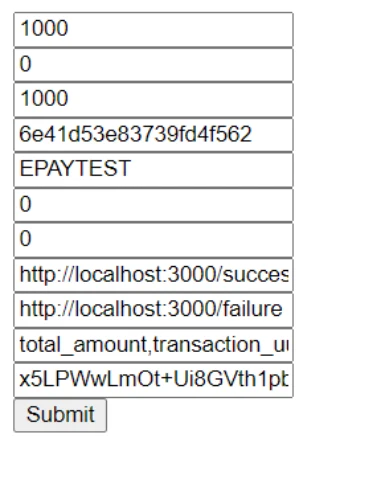
The form in the frontend looks like this:
In the above HTML code, we have initialized the variables:
order_price: Retrieves the price query parameter from the request.
amount: Assigns the order_price to amount.
tax_amount: Indicates the amount of tax applied to the order, initialized to 0 assuming no tax in this example. It will be added to the order price to sum up with the total transaction.
transaction_uuid: Generates a random string using the generateRandomString() function. This UUID uniquely identifies each transaction.
product_code: Sets a static product code (EPAYTEST in this case).
secretKey: Represents a secret key used for generating the signature parameter.
Signature Generation: Generates a cryptographic signature using the generateSignature() function. It concatenates total_amount, transaction_uuid, and product_code along with secretKey to ensure data integrity and authenticity when submitting the form.
product_service_charge and product_delivery_charge: Charges, if any, related to services or delivery associated with the product. These values are initialized to 0, assuming no additional charges in this scenario. They could be adjusted based on business logic or user inputs if applicable.
Success Url: This is the URL where eSewa redirects users after a successful payment transaction. It allows application to handle and display a success message or perform additional actions upon successful completion of the payment process.
Failure URL: This is the URL where eSewa redirects users if the payment transaction fails or is canceled. It Enables the application to inform users about the failure and possibly provide instructions or options to retry the payment or contact support.
Form Construction:
The route responds with an HTML form (<form>) that submits data to Esewa’s API (https://rc-epay.esewa.com.np/api/epay/main/v2/form) using the POST method.
Various <input> fields are included for essential parameters such as amount, transaction_uuid, product_code, success_url, failure_url, signed_field_names, and signature.
A submit button (<input type=”submit”>) initiates the form submission to start the payment process.
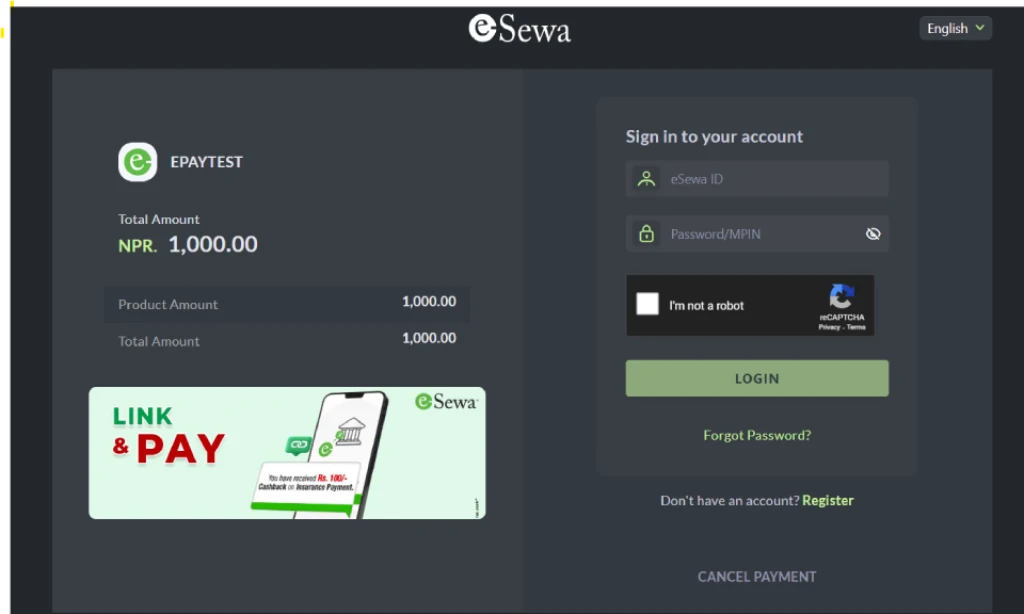
After clicking the submit button, the working esewa form will be displayed:

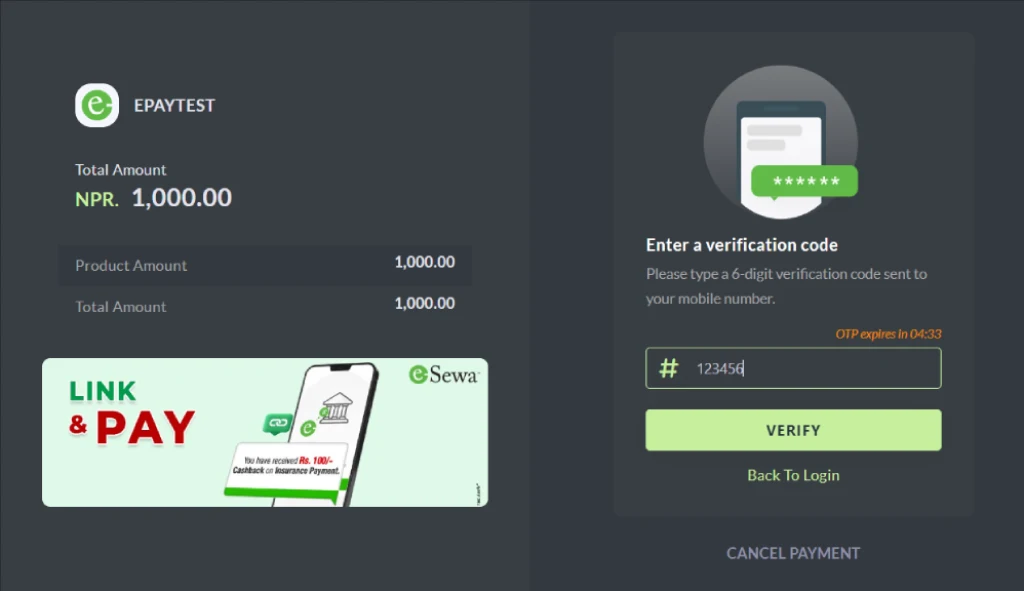
Login to your account. You will be asked the verification code. Enter your token.

Here, all the information of the user will be displayed. Press the continue button and proceed with the form.
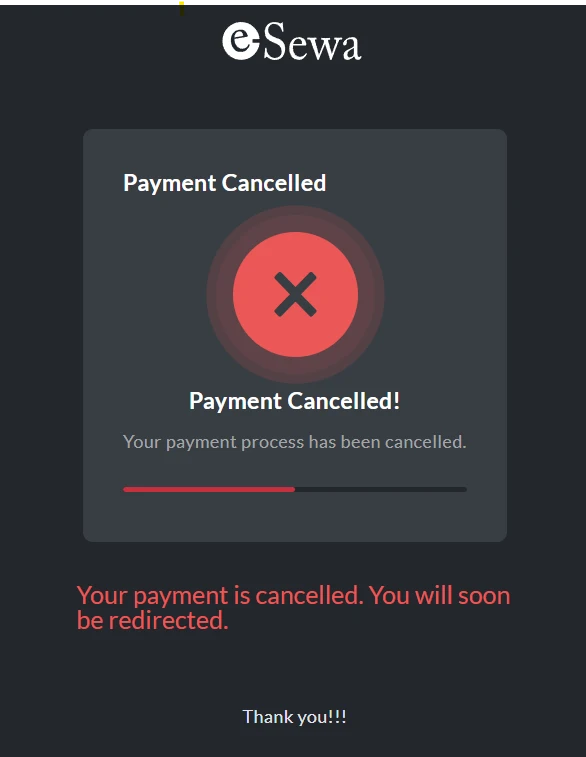
If the payment is successful, a payment success from will be displayed. If not, the form with failure message will be displayed.
Step 6: Handling Payment Responses
The /success and /failure routes handle the responses from Esewa. If the payment is successful, the /success route will return a success message; if the payment fails, the /failure route will return a failure message.
Failure Message
app.get("/failure", (req, res) => {
    console.log(req.query);
    res.json({ message: "Payment failed" });
});

Explanation:
This route is defined with Express.js to handle GET requests at /failure. In the payment form (<form>), the failure_url is specified as http://localhost:3000/failure (or your server’s URL). This ensures that if the payment fails, eSewa redirects the user back to this route.
The user sees the message “Payment failed” returned by the server, indicating the unsuccessful completion of the transaction.
({ message: “Payment failed” }): Sends a JSON response back to the client/browser with a simple message indicating that the payment failed.
Success Message
app.get("/success", (req, res) => {
    let token = req.query.data;
    let queryBody = JSON.parse(Buffer.from(token, "base64").toString("ascii"));
    res.json({ "message": `Payment Info ${queryBody}` });
});
Explanation
This route is defined with Express.js to handle GET requests at /success. It is typically set as the success_url in the payment form submitted to eSewa. In the payment form (<form>), the success_url is specified as http://localhost:3000/success (or your server’s URL). This ensures that if the payment is successful, eSewa redirects the user back to this route. The user sees the payment information returned by the server, confirming the successful completion of the transaction.
– let token = req.query.data;: Retrieves the data query parameter from the request URL, which typically contains a token or encoded data sent by eSewa.
– Buffer.from(token, “base64”).toString(“ascii”): Decodes the token from Base64 encoding to ASCII string format. This converts the encoded payment information into a readable format.
– JSON.parse(…): Converts the decoded ASCII string (queryBody) into a JavaScript object. This object contains the details of the successful payment transaction.
Step 7: Complete the Transaction Process
These JSON examples represent responses and data payloads that you receive from eSewa upon completing a payment transaction.
{
transaction_code: '0008040',
status: 'COMPLETE',
total_amount: '10.0',
transaction_uuid: '9b836129fe011f4d694f',
product_code: 'EPAYTEST',
signed_field_names: 'transaction_code,status,total_amount,transaction_uuid,product_code,signed_field_names',
signature: 'nfj+XVxqA8Y2U2eQQ4S1q+2/gYcT7RF7HSrUpT56Ts0='
}

{
data: 'eyJ0cmFuc2FjdGlvbl9jb2RlIjoiMDAwODA0MCIsInN0YXR1cyI6IkNPTVBMRVRFIiwidG90YWxfYW1vdW50IjoiMTAuMCIsInRyYW5zYWN0aW9uX3V1aWQiOiI5YjgzNjEyOWZlMDExZjRkNjk0ZiIsInByb2R1Y3RfY29kZSI6IkVQQVlURVNUIiwic2lnbmVkX2ZpZWxkX25hbWVzIjoidHJhbnNhY3Rpb25fY29kZSxzdGF0dXMsdG90YWxfYW1vdW50LHRyYW5zYWN0aW9uX3V1aWQscHJvZHVjdF9jb2RlLHNpZ25lZF9maWVsZF9uYW1lcyIsInNpZ25hdHVyZSI6Im5maitYVnhxQThZMlUyZVFRNFMxcSsyL2dZY1Q3UkY3SFNyVXBUNTZUczA9In0='
}
The second portion “data” is Base64 encoded version of the first portion, used for secure transmission of the transaction data provided by Esewa.
The first portion is Human-readable JSON data of the transaction. Once received the encoded data, this data can be decoded back to its original JSON format (first portion) to verify and use the transaction details.
Conclusion
In this way, we can integrate eSewa in Node.js for seamless transaction using Express.js as the framework. This integration includes setting up a Node.js project, configuring an Express server, creating necessary routes, and handling payment responses. It doesn’t only simplifies payment processing but also builds trust with your users by providing a reliable and secure payment solution. Following the above simple guidance can help you integrate your own payment gateway that allows users to use the most wildly accepted platform ‘Esewa’.
Learn more on How to Install NixOs on Hetzner VPS?
