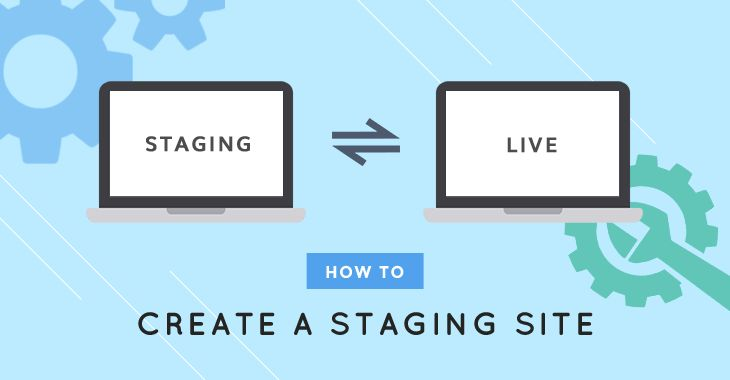
Most developers know they should test changes before pushing to production, but many skip staging environments because they think it’s complicated or requires expensive plugins. The truth is, you can create a fully functional WordPress staging site using nothing but cPanel’s built-in tools and a few manual steps that take less than 15 minutes.
This approach gives you complete control over your staging environment without monthly subscription fees or plugin dependencies that might break during updates.
Why Skip the Plugins?
While staging plugins like WP Staging or Duplicator Pro are convenient, they come with limitations. They often struggle with large databases, have file size restrictions on shared hosting, and can fail silently, leaving you with incomplete copies. Plus, understanding the manual process makes you a better developer and gives you flexibility when plugins aren’t available.
The manual approach also means:
- No plugin conflicts or compatibility issues
- Works on any cPanel hosting (even restrictive shared hosts)
- Complete control over what gets copied and what doesn’t
- Better understanding of your WordPress file structure
- No ongoing subscription costs
Planning Your Staging Setup
Before diving in, decide on your staging structure. Most developers use one of these approaches:
Subdomain Method (Recommended)
- Main site: yoursite.com
- Staging: staging.yoursite.com
Subdirectory Method
- Main site: yoursite.com
- Staging: yoursite.com/staging
The subdomain method is cleaner and avoids potential conflicts with your main site’s .htaccess rules or caching plugins.
Step 1: Create the Staging Subdomain
In cPanel, navigate to Subdomains under the Domains section:
- Subdomain: Enter staging
- Domain: Select your main domain
- Document Root: cPanel will auto-populate this (usually public_html/staging)
- Click Create
cPanel automatically creates the directory structure. You’ll see something like /public_html/staging in your file manager.
Step 2: Copy Your WordPress Files
Use cPanel’s File Manager for this step. Navigate to your main site’s directory (usually public_html):
Method A: Using File Manager Copy Function
- Select all files and folders in your main WordPress installation
- Click Copy in the toolbar
- Navigate to your staging directory (public_html/staging)
- Click Paste
- Wait for the copy operation to complete
Method B: Using Compressed Archive (Faster for Large Sites)
# If you have SSH access, this is much faster:
cd /public_html
tar -czf wordpress-backup.tar.gz –exclude=’*.log’ –exclude=’cache’ .
cd staging
tar -xzf ../wordpress-backup.tar.gz
rm ../wordpress-backup.tar.gz
For file manager users without SSH:
- Select all WordPress files
- Click Compress and choose Tar GZip Archive
- Name it staging-files.tar.gz
- Move the archive to your staging directory
- Navigate to the staging directory and extract the archive
- Delete the archive file when done
Step 3: Database Duplication
Create a New Database
In cPanel, go to MySQL Databases:
- Create New Database: Enter something like staging_db
- Create New User: Create staging_user with a strong password
- Add User to Database: Assign the user to the database with ALL PRIVILEGES
Export Your Production Database
Navigate to phpMyAdmin in cPanel:
- Select your production database
- Click the Export tab
- Choose the Quick export method
- Format: SQL
- Click Go
- Save the SQL file to your computer
Import to Staging Database
- In phpMyAdmin, select your new staging database
- Click the Import tab
- Choose the SQL file you just downloaded
- Click Go
The import might take a few minutes, depending on your database size.
Step 4: Update WordPress Configuration
Edit the wp-config.php file in your staging directory:
define(‘DB_NAME’, ‘staging_db’);
define(‘DB_USER’, ‘staging_user’);
define(‘DB_PASSWORD’, ‘your_staging_password’);
define(‘DB_HOST’, ‘localhost’); // Usually stays the same
define(‘WP_DEBUG’, true);
define(‘WP_DEBUG_LOG’, true);
define(‘DISALLOW_FILE_EDIT’, true);
define(‘WP_ENVIRONMENT_TYPE’, ‘staging’);
Step 5: Update URLs in Database
This is the crucial step that trips up many developers. Your staging site still thinks it lives at your production URL, causing broken links and redirect loops.
Using phpMyAdmin Search and Replace
In phpMyAdmin, select your staging database and run these SQL queries:
— Update site URL
UPDATE wp_options SET option_value = ‘https://staging.yoursite.com’
WHERE option_name = ‘home’;
UPDATE wp_options SET option_value = ‘https://staging.yoursite.com’
WHERE option_name = ‘siteurl’;
— Update content URLs (be careful with this one)
UPDATE wp_posts SET post_content = REPLACE(post_content,
‘https://yoursite.com’, ‘https://staging.yoursite.com’);
— Update metadata
UPDATE wp_postmeta SET meta_value = REPLACE(meta_value,
‘https://yoursite.com’, ‘https://staging.yoursite.com’);
— Update comments
UPDATE wp_comments SET comment_content = REPLACE(comment_content,
‘https://yoursite.com’, ‘https://staging.yoursite.com’);
Using WP-CLI (If Available)
If your host supports WP-CLI, this is much safer:
cd /public_html/staging
wp search-replace ‘https://yoursite.com’ ‘https://staging.yoursite.com’
Step 6: Handle SSL and Security
SSL Certificate Setup
Most cPanel hosts provide free SSL certificates through Let’s Encrypt:
- Go to SSL/TLS in cPanel
- Click Let’s Encrypt
- Select your staging subdomain
- Click Issue
Update .htaccess for Staging
Create or modify the .htaccess file in your staging directory:
# WordPress staging environment
<IfModule mod_rewrite.c>
RewriteEngine On
RewriteBase /
# Prevent search engine indexing
Header set X-Robots-Tag “noindex, nofollow”
# Standard WordPress rules
RewriteRule ^index\.php$ – [L]
RewriteCond %{REQUEST_FILENAME} !-f
RewriteCond %{REQUEST_FILENAME} !-d
RewriteRule. /index.php [L]
</IfModule>
# Additional security for staging
<Files wp-config.php>
order allow, deny
deny from all
</Files>
Step 7: Staging-Specific Configurations
Disable Email Sending
Add this to your staging wp-config.php to prevent accidental emails:
if (!function_exists(‘wp_mail’)) {
function wp_mail() {
return true;
}
}
Update WordPress Admin
- Visit https://staging.yoursite.com/wp-admin
- Log in with your regular credentials
- Go to Settings > General
- Verify the WordPress Address and Site Address URLs are correct
- Update if necessary
Plugin Considerations
Some plugins might need attention:
Caching Plugins: Disable or reconfigure cache paths
SEO Plugins: Disable XML sitemaps and search engine notifications
Backup Plugins: Disable automatic backups to avoid confusion
Security Plugins: Update allowed IP addresses if needed
Automation Script for Future Updates
Create a simple script to sync changes from production to staging:
#!/bin/bash
# staging-sync.sh
PROD_PATH=”/public_html”
STAGING_PATH=”/public_html/staging”
PROD_DB=”production_db”
STAGING_DB=”staging_db”
echo “Syncing files…”
rsync -av –exclude=’wp-config.php’ –exclude=’*.log’ \
$PROD_PATH/ $STAGING_PATH/
echo “Backing up staging database…”
mysqldump $STAGING_DB > staging_backup_$(date +%Y%m%d).sql
echo “Copying production database…”
mysqldump $PROD_DB | mysql $STAGING_DB
echo “Updating URLs…”
mysql $STAGING_DB -e “UPDATE wp_options SET option_value = ‘https://staging.yoursite.com’ WHERE option_name IN (‘home’, ‘siteurl’);”
echo “Staging sync complete!”
Testing Your Staging Environment
Basic Functionality Tests
| Test | Expected Result | Notes |
| Homepage loads | ✓ No errors | Check for broken images |
| Admin login | ✓ Dashboard accessible | Verify all admin functions work |
| Plugin activation | ✓ No fatal errors | Test critical plugins only |
| Theme switching | ✓ Themes load correctly | Verify customizations persist |
| Content creation | ✓ Posts/pages save | Test editor functionality |
Common Issues and Fixes
Mixed Content Warnings: Update hardcoded HTTP links to HTTPS
UPDATE wp_posts SET post_content = REPLACE(post_content, ‘http://’, ‘https://’);
Broken Images: Verify image URLs were updated correctly
SELECT * FROM wp_options WHERE option_value LIKE ‘%yoursite.com%’;
Plugin Conflicts: Deactivate non-essential plugins first, then reactivate one by one
Maintaining Your Staging Environment

Regular Sync Schedule
Establish a routine for keeping staging current:
Weekly: Sync database for content updates
Before Major Changes: Full file and database sync
After Plugin Updates: Test updates in staging first
Staging-to-Production Workflow
When you’re ready to push changes live:
- Document Changes: Keep notes on what you modified
- Export Staging Database: If content was added in staging
- Sync Files: Copy modified files to production
- Update URLs: Run search-replace to restore production URLs
- Test Production: Verify everything works correctly
Security Best Practices
Access Control
# Add to staging .htaccess for IP restriction
<RequireAll>
Require IP 123.456.789.0 # Your office IP
Require IP 98.765.432.1 # Your home IP
</RequireAll>
Password Protection
Add layers via cPanel’s Password Protect Directories:
- Select your staging directory
- Enable password protection
- Create a staging-specific username/password
- This adds HTTP authentication before WordPress login
Troubleshooting Common Problems
Redirect Loops: Usually caused by incorrect URL settings
- Check the wp_options table for home and siteurl values
- Verify .htaccess doesn’t have conflicting redirects
File Permission Issues:
# Standard WordPress permissions
find /public_html/staging -type d -exec chmod 755 {} \;
find /public_html/staging -type f -exec chmod 644 {} \;
chmod 600 wp-config.php
Database Connection Errors: Double-check wp-config.php database credentials
Missing Images: Often means URLs weren’t updated correctly in the database
Setting up a staging environment manually might seem like extra work compared to using a plugin, but it gives you complete control and a deep understanding of your WordPress setup. Once you’ve done it a few times, the entire process takes less than 15 minutes and provides a robust testing environment that won’t break during plugin updates or hosting changes.
The skills you learn doing this manually will serve you well throughout your WordPress development career, especially when working with complex setups where automated tools fall short.