Introduction
Remember the days when setting up WordPress meant wrestling with XAMPP, configuring databases, and dealing with version conflicts that made you want to throw your laptop out the window? Well, those days are officially over. Welcome to the world of Docker, where setting up WordPress is as easy as ordering momo on Foodmandu.
If you’ve been hearing about Docker and thinking it’s only for hardcore developers, think again. Docker has become the go-to solution for web developers and businesses worldwide, and it’s time Nepal’s web community embraced this game-changing technology. At Nest Nepal, we’ve seen businesses cut their deployment time from hours to minutes using Docker.
Today, we’re going to walk through deploying WordPress with Docker Compose in a way that’s so simple, even your cousin who still thinks “the cloud” is something in the sky will understand it.
What Exactly Is Docker and Why Should You Care?
Before we dive into the technical stuff, let’s understand what we’re dealing with. Think of Docker as a magic box that packages your entire WordPress site- the code, database, web server, and all dependencies into a single, portable container.
It’s like having a complete restaurant (your WordPress site) that you can pack up and set up anywhere in minutes, complete with the kitchen, dining area, and all the equipment, without worrying about whether the new location has the right infrastructure.
The Traditional WordPress Headache
Here’s what setting up WordPress traditionally looked like:
- Install a web server (Apache/Nginx)
- Install PHP and configure it
- Install MySQL database
- Download WordPress
- WordPress Tuning
- Deal with version conflicts
- Pray nothing breaks
- When something inevitably breaks, spend hours troubleshooting
The Docker Way
With Docker Compose, it looks like this:
- Create a configuration file
- Run one command
- Your WordPress site is ready
- Seriously, that’s it
Docker Compose vs. Traditional Hosting: The Reality Check
Let me share a real example. Last month, a client in Lalitpur wanted to set up a development environment that matched their production server exactly. With traditional methods, it took our team 6 hours and multiple back-and-forth emails to get everything working correctly.
With Docker? 15 minutes. Same environment, every time, on any computer.
Why Docker Compose Is Perfect for WordPress in Nepal
1. Consistency Across Environments: Your local development environment will be identical to your staging and production environments. No more “it works on my machine” problems.
2. Easy Backups and Migration: Moving your entire WordPress setup to a new server? Just copy a few files and run a command. It’s that simple.
3. Resource Efficiency: Docker containers use fewer resources than traditional virtual machines, which is perfect when you’re working with limited server resources.
4. Version Control: Want to test WordPress 6.4 but keep 6.3 as backup? Easy. Want PHP 8.1 for one project and PHP 7.4 for another? No problem.
5. Team Collaboration: Your entire team can have identical development environments, regardless of whether they’re using Windows, Mac, or Linux.
Prerequisites: What You Need Before We Start
Don’t worry – the requirements are minimal:
System Requirements
- Any computer with at least 4GB RAM (8GB recommended)
- 10GB free disk space
- Internet connection for initial downloads
- Basic familiarity with the command line (don’t panic – we’ll guide you through everything)
Software Requirements
- Docker Desktop (free)
- A text editor (VS Code, Notepad++, or even Windows Notepad works)
- Web browser (you already have this)
That’s it. No XAMPP, no separate MySQL installation, no PHP configuration headaches.
Installing Docker: Your First Step
For Windows Users
- Download Docker Compose Desktop
- Go to https://www.docker.com/products/docker-desktop
- Download the Windows version
- Run the installer (it’s about 400MB)
- Installation Process
- Follow the installation wizard
- When prompted, enable WSL 2 (Windows Subsystem for Linux)
- Restart your computer when asked
- Verify Installation
- Open Command Prompt or PowerShell
- Type: docker –version
- You should see something like “Docker version 24.0.6”
For Mac Users
- Download Docker Desktop
- Go to https://www.docker.com/products/docker-desktop
- Choose the version for your Mac (Intel or Apple Silicon)
- Install like any other Mac application
- Verify Installation
- Open Terminal
- Type: docker –version
For Linux Users (Ubuntu/Debian)
# Update your system
sudo apt update

# Install Docker
sudo apt install docker.io docker-compose

# Start Docker service
sudo systemctl start docker
sudo systemctl enable docker

# Add your user to docker group (to avoid using sudo)
sudo usermod -aG docker $USER

# Log out and log back in, then verify
docker --version
Understanding Docker Compose
Docker Compose is like a recipe book for Docker. Instead of manually starting multiple containers (one for WordPress, one for the database, etc.), you write a “recipe” (called a docker-compose.yml file) that describes your entire application stack.
Think of it as creating a meal kit; everything you need is packaged together with clear instructions, and you can recreate the same meal anywhere.
Creating Your WordPress Project Structure
Let’s create a proper folder structure for our WordPress project. This organization will make managing your site much easier.
Step 1: Create Project Directory
# Navigate to your desired location (e.g., Desktop)
cd ~/Desktop

# Create project folder
mkdir my-wordpress-site
cd my-wordpress-site

# Create subdirectories
mkdir wordpress-data
mkdir database-data

Your folder structure should look like this:
my-wordpress-site/
├── docker-compose.yml (we'll create this next)
├── wordpress-data/ (WordPress files will live here)
└── database-data/ (MySQL data will be stored here)
Step 2: Create the Docker Compose Configuration
This is where the magic happens. Create a file named docker-compose.yml in your project directory and add the following content:
version: '3.8'

services:
  # WordPress service
  wordpress:
    image: wordpress:latest
    container_name: my-wordpress
    restart: unless-stopped
    ports:
      - "8080:80"
    environment:
      WORDPRESS_DB_HOST: database:3306
      WORDPRESS_DB_USER: wordpress_user
      WORDPRESS_DB_PASSWORD: strong_password_123
      WORDPRESS_DB_NAME: wordpress_db
    volumes:
      - ./wordpress-data:/var/www/html
    depends_on:
      - database
    networks:
      - wordpress-network

  # MySQL database service
  database:
    image: mysql:8.0
    container_name: my-wordpress-db
    restart: unless-stopped
    environment:
      MYSQL_DATABASE: wordpress_db
      MYSQL_USER: wordpress_user
      MYSQL_PASSWORD: strong_password_123
      MYSQL_ROOT_PASSWORD: root_password_123
    volumes:
      - ./database-data:/var/lib/mysql
    networks:
      - wordpress-network

  # phpMyAdmin for database management (optional but helpful)
  phpmyadmin:
    image: phpmyadmin:latest
    container_name: my-phpmyadmin
    restart: unless-stopped
    ports:
      - "8081:80"
    environment:
      PMA_HOST: database
      PMA_PORT: 3306
      MYSQL_ROOT_PASSWORD: root_password_123
    depends_on:
      - database
    networks:
      - wordpress-network

networks:
  wordpress-network:
    driver: bridge

volumes:
  wordpress-data:
  database-data:
Understanding the Configuration
Let me break down what this configuration does:
WordPress Service:
- Uses the official WordPress Docker image
- Runs on port 8080 (so you’ll access it via http://localhost:8080)
- Connects to our database service
- Stores WordPress files in the wordpress-data folder
Database Service:
- Uses MySQL 8.0
- Creates a database specifically for WordPress
- Stores data in the database-data folder
- Uses secure passwords (change these for production!)
phpMyAdmin Service:
- Provides a web interface for database management
- Accessible at http://localhost:8081
- Optional but incredibly helpful for beginners
Networks:
- Creates a private network so all services can communicate securely
Volumes:
- Ensures your data persists even if containers are recreated
Deploying Your WordPress Site
Now comes the exciting part: actually launching your WordPress site!
Step 1: Launch the Services
Open your terminal/command prompt, navigate to your project directory, and run:
# Navigate to your project directory
cd ~/Desktop/my-wordpress-site

# Start all services
docker-compose up -d

The -d flag runs everything in "detached" mode (in the background).
You'll see output like this:
Creating network "my-wordpress-site_wordpress-network" with driver "bridge"
Creating my-wordpress-db ... done
Creating my-phpmyadmin  ... done
Creating my-wordpress   ... done
Step 2: Verify Everything Is Running
Check that all containers are running properly:
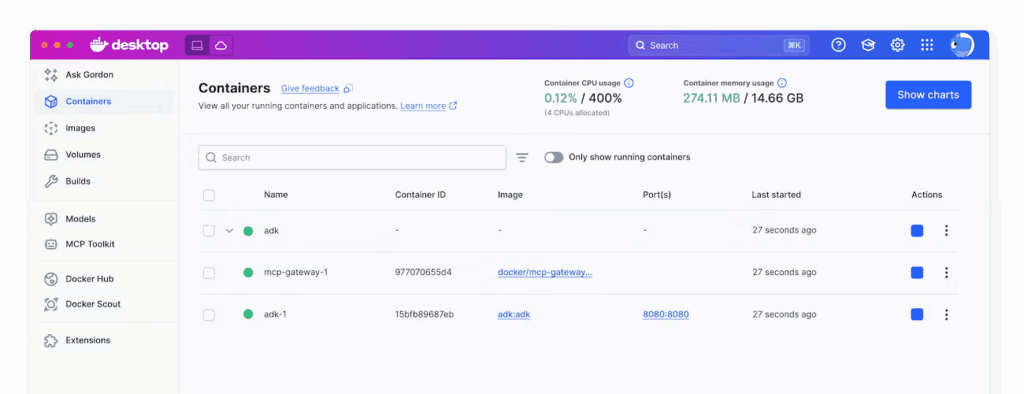
docker-compose ps
You should see all three services with “Up” status.
Step 3: Access Your WordPress Site
Open your web browser and go to:
- WordPress site: http://localhost:8080
- phpMyAdmin: http://localhost:8081
You should see the famous WordPress 5-minute installation screen!
WordPress Installation Process
Step 1: Choose Your Language
Select your preferred language (नेपाली is available if you want to create a Nepali WordPress site).
Step 2: Database Connection
WordPress will automatically detect the database connection; this is the magic of Docker Compose networking!
Step 3: Site Configuration
Fill in your site details:
- Site Title: Your website name
- Username: Admin username (don’t use ‘admin’ for security)
- Password: Strong password
- Email: Your email address
Step 4: Install WordPress
Click “Install WordPress” and wait for the magic to happen.
Managing Your WordPress Docker Environment
Starting and Stopping Services
# Start all services
docker-compose up -d

# Stop all services
docker-compose down

# Restart services
docker-compose restart

# View logs
docker-compose logs wordpress
Updating WordPress and MySQL
# Stop services
docker-compose down

# Pull latest images
docker-compose pull

# Start with updated images
docker-compose up -d
Customizing Your Setup
Adding SSL (HTTPS) Support
For production use, you’ll want HTTPS. Here’s how to add it:
- Install Nginx Proxy Manager (easiest option)
- Use Traefik (more advanced but powerful)
- Use Cloudflare (recommended for beginners)
Performance Optimization
Add these environment variables to your WordPress service:
environment:
  # ... existing environment variables ...
  WORDPRESS_CONFIG_EXTRA: |
    define('WP_MEMORY_LIMIT', '256M');
    define('WP_MAX_MEMORY_LIMIT', '512M');
    define('WP_CACHE', true);
Adding Redis for Caching
Add this service to your docker-compose.yml:
 redis:
    image: redis:alpine
    container_name: my-redis
    restart: unless-stopped
    networks:
      - wordpress-network
Backup and Migration Strategies
Creating Backups
# Create a complete backup
docker-compose exec database mysqldump -u root -p wordpress_db > backup.sql

# Backup WordPress files
cp -r wordpress-data wordpress-backup-$(date +%Y%m%d)
Migrating to Production
- Copy your entire project folder to the production server
- Update database passwords in docker-compose.yml
- Change port mappings (use 80:80 instead of 8080:80)
- Run docker-compose up -d
That’s it! Your entire WordPress site moves with just a folder copy.
Troubleshooting Common Issues
Issue 1: Port Already in Use
Error: “Port 8080 is already in use”
Solution: Change the port in docker-compose.yml:
ports:
  - "8090:80"  # Use port 8090 instead
Issue 2: Database Connection Error
Error: “Error establishing a database connection.”
Solutions:
- Wait 30-60 seconds for MySQL to fully start
- Check that all containers are running: docker-compose ps
- Restart services: docker-compose restart
Issue 3: Permission Denied
Error: Permission issues with volumes.
Solution (Linux/Mac):
sudo chown -R $USER:$USER wordpress-data
sudo chown -R $USER:$USER database-data
Issue 4: Out of Disk Space
Error: No space left on device.
Solution: Clean up Docker:
docker system prune -aProduction Deployment Considerations
Security Hardening
Change Default Passwords
environment:
MYSQL_PASSWORD: your-super-strong-password-here
MYSQL_ROOT_PASSWORD: another-super-strong-password- Remove phpMyAdmin (not needed in production)
- Comment out or remove the phpMyAdmin service
Use Environment Files:
Create a .env file for sensitive data:

DB_PASSWORD=your-secret-password
DB_ROOT_PASSWORD=your-secret-root-password
Limit Resource Usage
 deploy:
  resources:
    limits:
      memory: 512M
      cpus: "0.5"
Performance Optimization
Use Specific Image Versions
image: wordpress:6.4-php8.1-apache
image: mysql:8.0.35
Configure MySQL for Better Performance
command: --innodb-buffer-pool-size=128M --max-connections=50Add Health Checks
 healthcheck:
  test: ["CMD", "curl", "-f", "http://localhost"]
  interval: 30s
  timeout: 10s
  retries: 5
Scaling Your WordPress Site
Multiple WordPress Sites
You can run multiple WordPress sites with different configurations:
# Site 1
mkdir site1 && cd site1
# Create docker-compose.yml with ports 8080, 8081

# Site 2
mkdir ../site2 && cd ../site2
# Create docker-compose.yml with ports 8090, 8091
Load Balancing
For high-traffic sites, add a load balancer:
 nginx:
    image: nginx:alpine
    ports:
      - "80:80"
    volumes:
      - ./nginx.conf:/etc/nginx/nginx.conf
    depends_on:
      - wordpress1
      - wordpress2
Monitoring and Logging
Container Health Monitoring
# Check container status
docker-compose ps

# View resource usage
docker stats

# Check logs
docker-compose logs -f wordpress
Setting Up Log Rotation
Add to your docker-compose.yml:
logging:
  driver: "json-file"
  options:
    max-size: "10m"
    max-file: "3"
Advanced Docker Compose Features
Using Override Files
Create docker-compose.override.yml for development-specific settings:
version: '3.8'
services:
  wordpress:
    environment:
      WORDPRESS_DEBUG: 1
    volumes:
      - ./themes:/var/www/html/wp-content/themes
      - ./plugins:/var/www/html/wp-content/plugins
Environment-Specific Configurations
# Development
docker-compose -f docker-compose.yml -f docker-compose.dev.yml up -d

# Production
docker-compose -f docker-compose.yml -f docker-compose.prod.yml up -d
Integration with CI/CD
GitHub Actions Example
name: Deploy WordPress
on:
  push:
    branches: [main]

jobs:
  deploy:
    runs-on: ubuntu-latest
    steps:
      - uses: actions/checkout@v2
      - name: Deploy to server
        run: |
          docker-compose pull
          docker-compose up -d
Why This Matters for Nepal’s Web Development Scene
The adoption of Docker and containerization technologies is revolutionizing how we develop and deploy websites globally. For Nepal’s growing tech industry, mastering these tools means:
- Competitive Advantage: Clients worldwide expect modern deployment practices
- Faster Development: Reduced setup time means more time for actual development
- Better Collaboration: Teams can work seamlessly across different environments
- Cost Efficiency: Fewer server resources needed, lower hosting costs
- Professional Growth: Docker skills are highly valued in the international job market
Common Mistakes to Avoid
1. Not Using Volume Mounts
Wrong: Letting Docker manage data internally
Right: Using volume mounts to persist data
2. Using Default Passwords in Production
Wrong: Keeping ‘password123’ in production
Right: Using strong, unique passwords
3. Not Managing Container Resources
Wrong: Letting containers use unlimited resources
Right: Setting memory and CPU limits
4. Ignoring Security Updates
Wrong: Never updating Docker images
Right: Regular updates using docker-compose pull
5. Not Backing Up Data
Wrong: Assuming Docker handles backups
Right: Creating regular backups of volumes
Next Steps: Taking Your Docker Skills Further
Once you’re comfortable with this basic WordPress setup, consider exploring:
- Multi-stage builds for custom WordPress images
- Docker Swarm for container orchestration
- Kubernetes for enterprise-level deployments
- CI/CD pipelines with automated testing and deployment
- Monitoring solutions like Prometheus and Grafana
Conclusion: Welcome to Modern WordPress Development
Congratulations! You’ve just deployed WordPress using Docker Compose. A skill that puts you ahead of 90% of traditional WordPress developers. What used to be hours of configuration and troubleshooting is now a simple, repeatable process.
This isn’t just about making your life easier (though it definitely does that). It’s about adopting industry-standard practices that will serve you well, whether you’re building sites for local businesses in Kathmandu or clients in Silicon Valley.
The beauty of Docker is that it grows with you. Start with simple WordPress sites, then expand to complex applications with multiple services, databases, and integrations. The principles remain the same, but the possibilities are endless.
At Nest Nepal, we’ve seen how adopting modern deployment practices like Docker has helped our clients launch faster, scale easier, and maintain their sites with confidence. It’s not just a technical upgrade, it’s a business advantage.
Your WordPress journey with Docker starts here, but it doesn’t end here. Keep experimenting, keep learning, and most importantly, keep building amazing things. The Nepal tech community is growing stronger every day, and you’re now part of that growth.
Remember, every expert was once a beginner. You’ve taken the first step into modern web development practices, and that’s something to be proud of.
Ready to take your WordPress hosting to the next level with Docker? Need help setting up production environments or scaling your containerized applications? The team at Nest Nepal specializes in modern hosting solutions and would love to help you leverage the full power of Docker for your business needs.