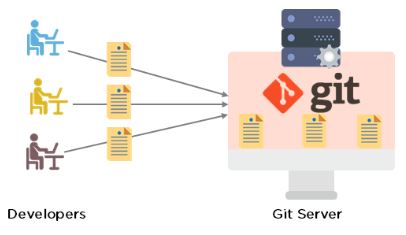
Gone are the days of dragging and dropping files over FTP and manually updating production websites. Today, smart developers and digital businesses rely on control systems like Git Version to manage their codebases, collaborate effectively, and streamline deployments.

And here’s the good news: cPanel comes with built-in Git support! That means you can bring the power of Git workflows into your shared or VPS hosting environment.
This guide will walk you through everything, from setting up a repository to deploying updates from Git to your live website, all securely and professionally.
Why Use Git with cPanel?
Before jumping into the steps, let’s understand why Git and cPanel together make so much sense:
- Safe deployments: Rollback anytime.
- Team collaboration: Work with others using pull/push workflows.
- Production-ready code: No more accidental overwrites.
- Secure codebase: SSH-authenticated pushes.
- Cleaner workflow: You work locally, push remotely, done.
Prerequisites
To follow this guide, you’ll need:

- A hosting account with cPanel (v90 or above)
- Git is installed on your local machine (Windows/macOS/Linux)
- SSH access is enabled on your hosting account (we’ll show you how)
- Optional: A basic Laravel/PHP project (or any web project you want to deploy)
Step 1: Create a Git Repository in cPanel
- Log in to your cPanel dashboard.
- Search for “Git Version Control” in the search bar.
- Click on “Create Repository.”
- Choose a clone repository if your code is on GitHub or GitLab. Or create a new empty one if you’re initializing it later.
- Repository path: /home/youruser/repositories/my-website
- Repository name: my-website
- Hit Create.
✅ Your Git repo is now live inside your hosting account.
Step 2: Set Up SSH Access (For Secure Pushes)
Using Git securely requires SSH authentication.
On Your Local Computer:
ssh-keygen -t rsa -b 4096 -C “[email protected]”
- Save the file (press Enter to use the default path ~/.ssh/id_rsa)
- Then copy your public key:
cat ~/.ssh/id_rsa.pub
On cPanel:
- Open SSH Access > Manage SSH Keys
- Click Import Key
- Paste your id_rsa.pub contents into the public key box
- Authorize the key
Done! You can now push to your repo securely.
Step 3: Add Remote & Push Code from Local Git
From your terminal:
cd your-local-project-folder
git init
git remote add live ssh://[email protected]/home/youruser/repositories/my-website
git add.
git commit -m “Initial commit”
git push live master
Now your code lives on your server.
If you’re using GitHub or GitLab, you can instead have cPanel pull directly from those remotes. More on that later.
Step 4: Deploy the Code to Public_HTML (Live Website)
Just because the repo lives on your server doesn’t mean it’s live yet.
Let’s deploy it:
- Go back to Git Version Control in cPanel
- Click Manage on your repository
- Under Deployment, choose:
- Deployment directory: /public_html or any subfolder.
- Deployment branch: usually master or main
- Click Deploy HEAD Commit
Boom! Git now powers your website.
Optional: Auto-Deploy on Push (Post-Receive Hook)
Want changes to go live automatically every time you push? Set up auto-deploy:
- In cPanel’s File Manager, go to your .git/hooks folder inside your repo path.
- Edit or create a post-receive file:
#!/bin/bash
GIT_WORK_TREE=/home/youruser/public_html git checkout -f
- Make it executable:
chmod +x post-receive
Now every push = auto update.
Git Workflow Example: Laravel App Deployment
Let’s say you’re deploying a Laravel app:
- Your repo has the entire Laravel structure
- Public files are inside public/
- You want public/ to be your public_html
Solution:
- Set repo in /home/user/laravel-app
- Deploy only public/ to /home/user/public_html
- Point index.php and bootstrap to correct paths (adjust if needed)
Bonus: You can use .env.production and symlink it as .env for live config.

Best Practices for Git + cPanel Deployments
- Use separate branches for staging and production
- Don’t commit sensitive .env or config files; use server-only copies
- Set proper file permissions after deploy (especially for storage/ and bootstrap/cache/)
- Enable 2FA on GitHub and use deploy keys
- Keep a backup before you deploy (always!)
Recap: Git-Powered Hosting = Smarter Web Development
With Git and cPanel working together, your workflow becomes:
- Develop locally
- Push securely
- Deploy instantly
- It’s faster, safer, and way more professional than manual uploads.
Whether you’re a solo developer, an agency, or a startup, mastering Git-based deployment on shared hosting gives you an edge.
So go ahead and set up that repo, push your code, and take control of your website’s future! Need a Git-friendly hosting provider in Nepal? Most modern cPanel hosts support Git (like Nest Nepal), so choose one that gives you SSH and Git Version Control in your panel.