


Link cPanel email to Gmail
What is a cPanel? cPanel is a web-based control panel that allows website owners and hosting providers to manage various aspects of their websites and servers. It provides a user-friendly interface with a range of tools and features that make it easy to manage your website and host your account.
Here is an example of what the cPanel dashboard might look like:
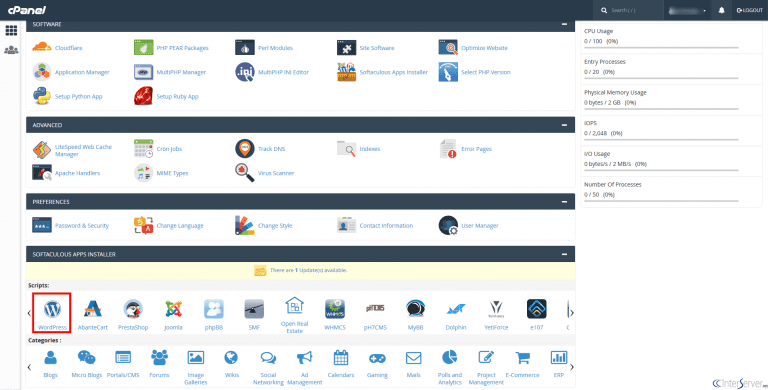
As you can see, the dashboard provides an overview of your hosting account and offers a range of options for managing different aspects of your website. You can access different features and tools by clicking on the icons in the dashboard or using the search bar to find specific options.
cPanel is a powerful tool that can help you save time and effort when managing your website and hosting account. It is beneficial for those unfamiliar with server administration or who do not have the technical skills to manage their websites manually.
Overall, cPanel is an essential tool for anyone who owns or manages a website, and it can help you take control of your online presence and ensure that your website is running smoothly and efficiently.
How to link cPanel with a Gmail account?
Now to connect your Gmail account with cPanel, follow these steps:
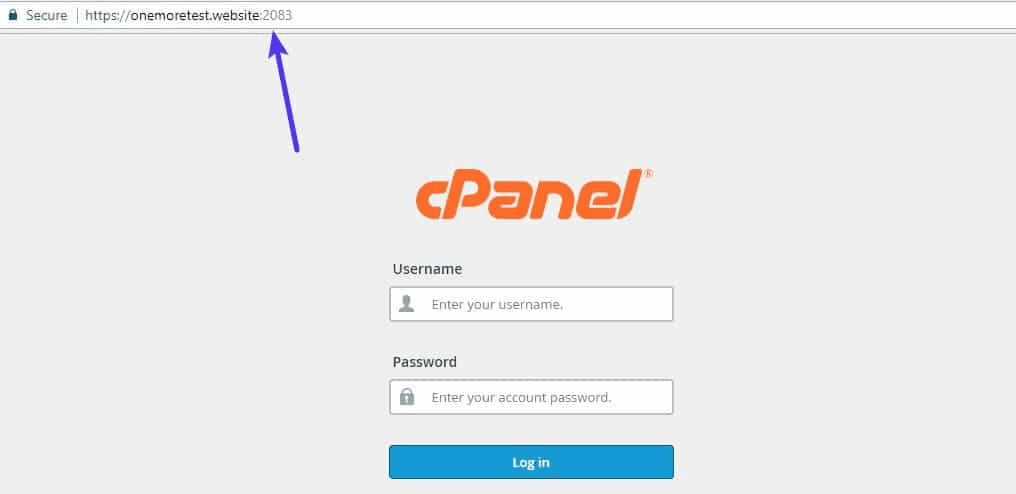
- Log in to your cPanel account by visiting the URL provided by your hosting provider and entering your login details. The login page should look similar to this:
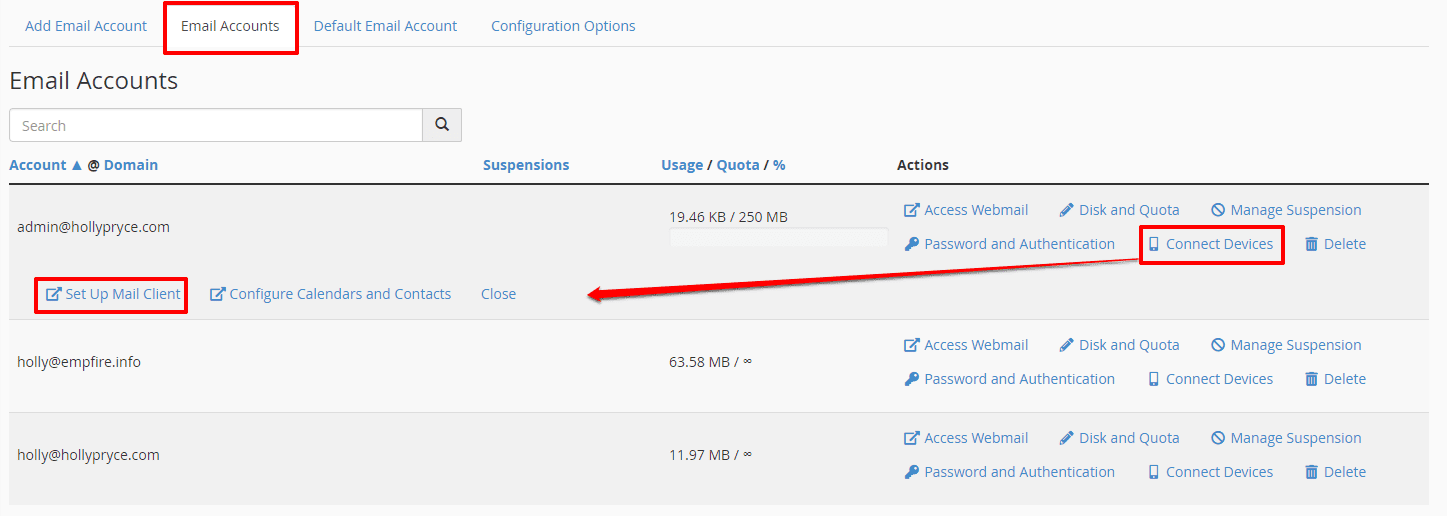
- Once you have logged in, you will be taken to the cPanel dashboard. In the “Email” section, click on the “Email Accounts” icon.
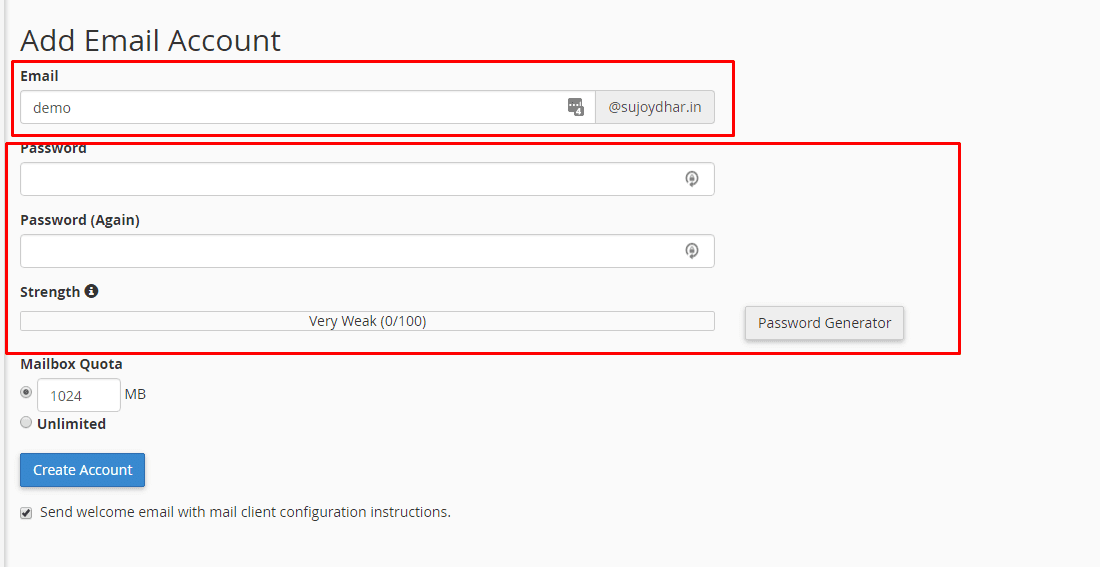
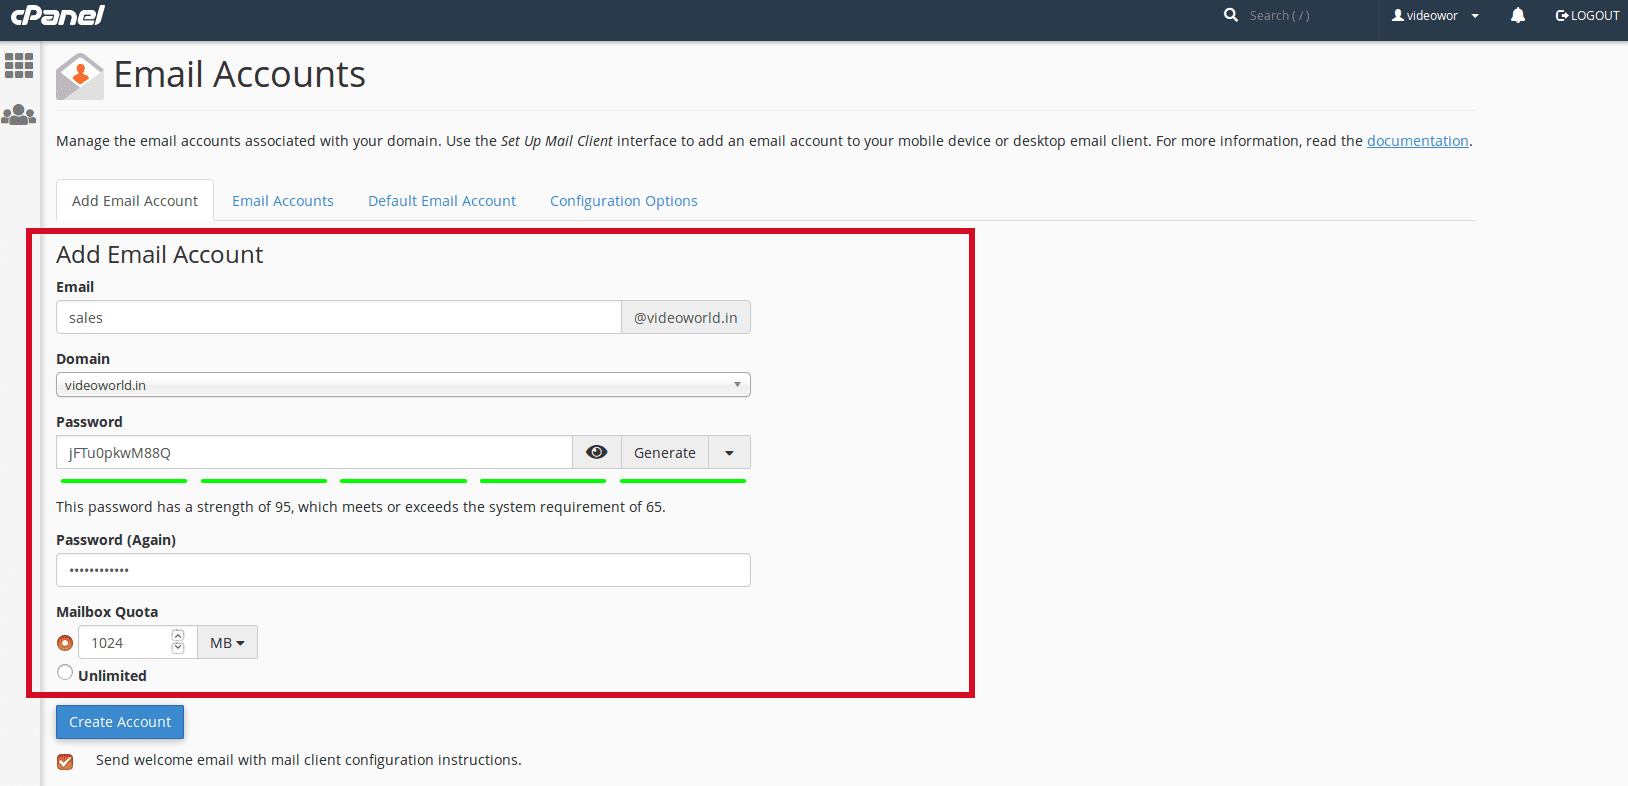
- On the Email Accounts page, you will see a list of any email accounts that have already been set up for your domain. To create a new email account, scroll down to the “Create a New Email Account” section.
- In the “Email” field, enter the desired username for the new account. This will become the first part of the email address, so if you enter “nestnepal,” the email address will be nestnepal@yourdomain.com.
- In the “Password” field, enter a strong password for the new account. It is important to use a unique and secure password to protect your email account from unauthorized access.
- In the “Password (Again)” field, re-enter the password to confirm it.
- In the “Mailbox Quota” field, enter the amount of storage space you want to allocate for the email account. This is the amount of space the account can use for storing emails and attachments.
- When you have finished entering the account details, click the “Create Account” button to create a new email account.
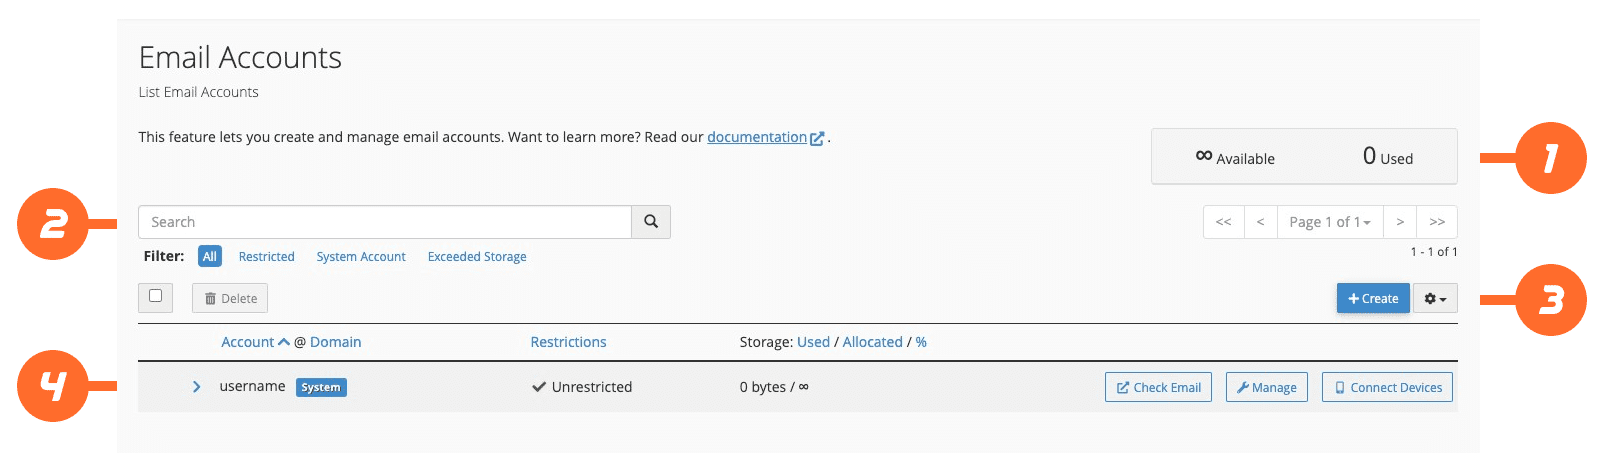
- Once the account has been created, you will see a success message and the new email account will be listed on the Email Accounts page.
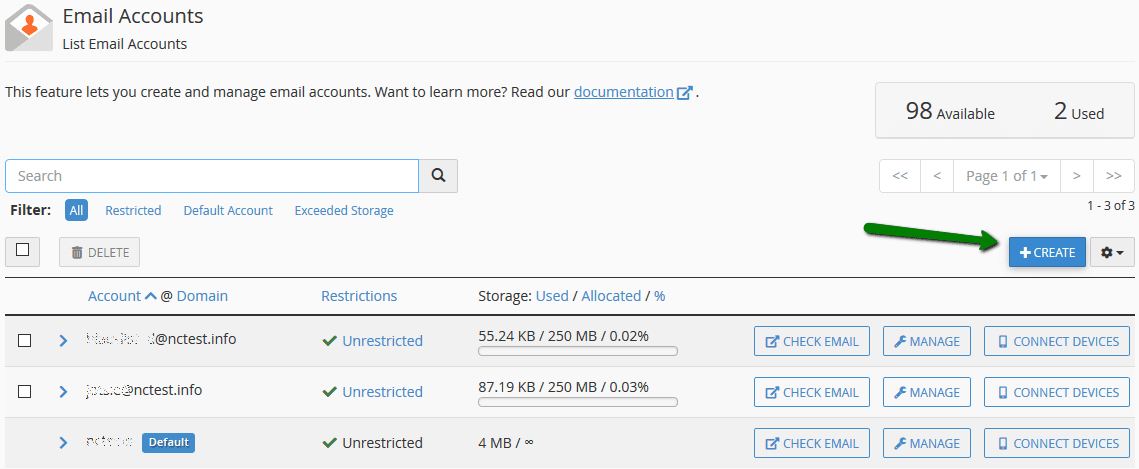
- To connect your Gmail account to cPanel, click on the “Connect Devices” button next to the new email account.

- On the “Connect Devices” page, you will see a list of different mail clients and devices that you can use to access your email account. To connect your Gmail account, click on the “Configure Mail Client” button and select “Gmail” from the drop-down menu.
- You will be taken to a page with instructions on how to connect your Gmail account to cPanel. Follow these instructions to complete the process.
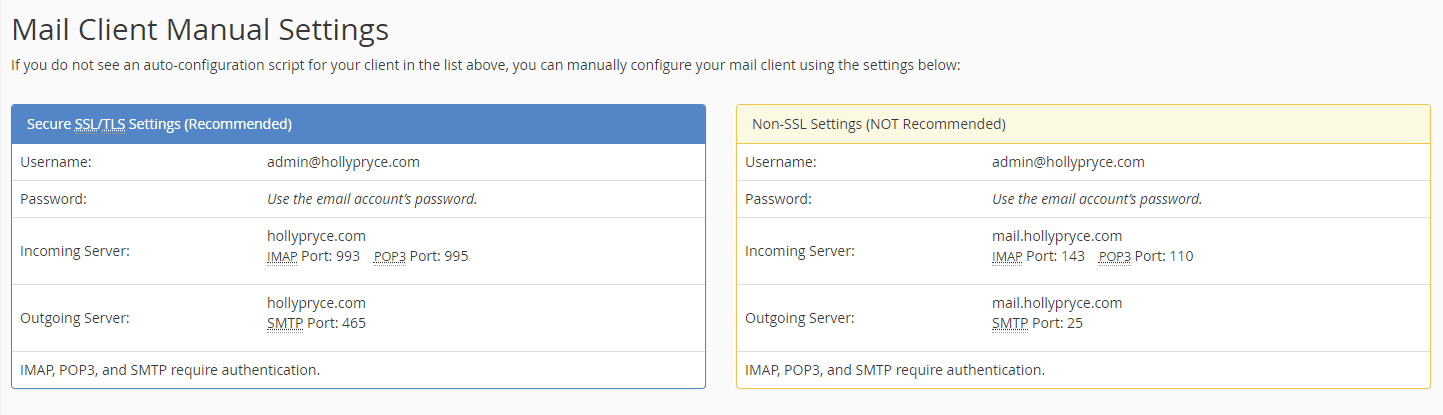
- The instructions will include a link to a Google login page, where you will be asked to enter your Gmail login credentials and allow cPanel access to your account.
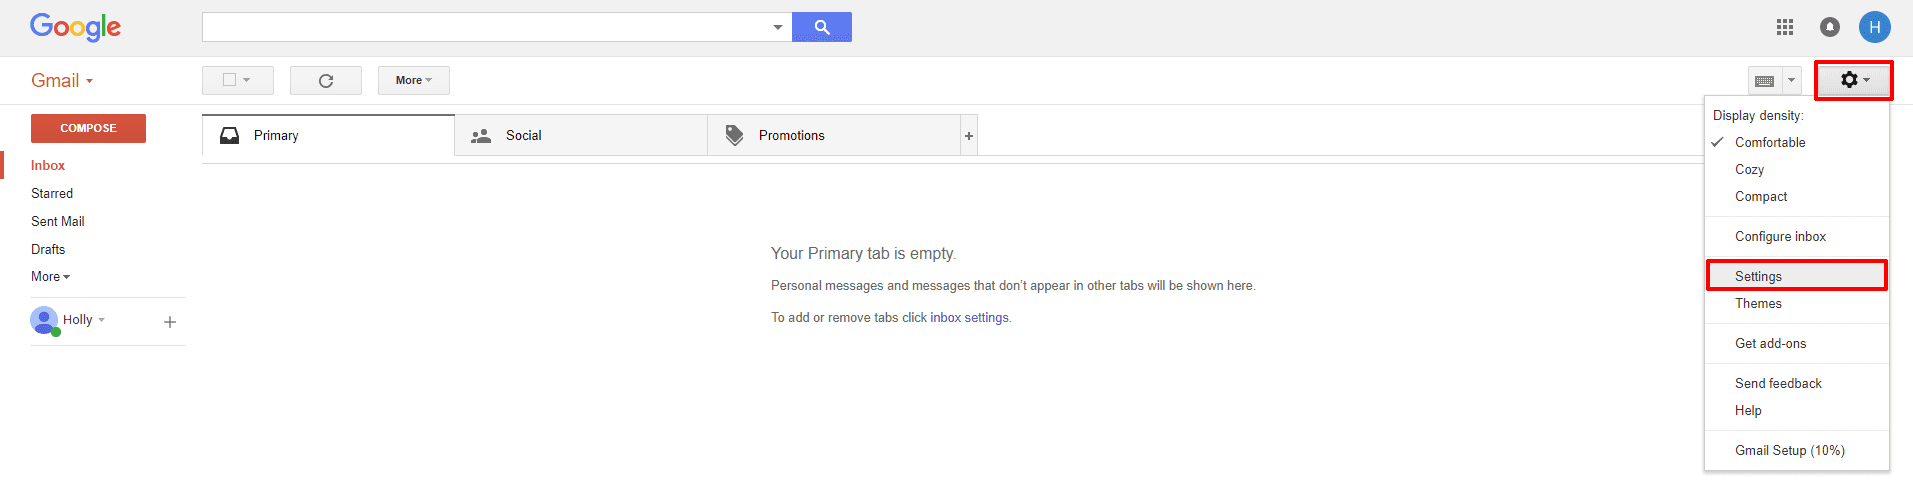
14. Enter the email address associated with the account that you want to add to your Gmail account and complete the further steps as it comes.

- Once you have completed the steps in the instructions, your Gmail account should be successfully connected to cPanel. You should now be able to send and receive emails from your Gmail account through cPanel.
Want to read more, check my blog post:
Please visit our hosting plan.
Thanks for reading!!