

In this blog we’ll learn some easy steps to enable “SSL” using Let’s Encrypt in your site and make it “Secure” from “Not Secure”.
Let’s enable SSL using Encrypt from cPanel
Follow these steps exactly to get it done.
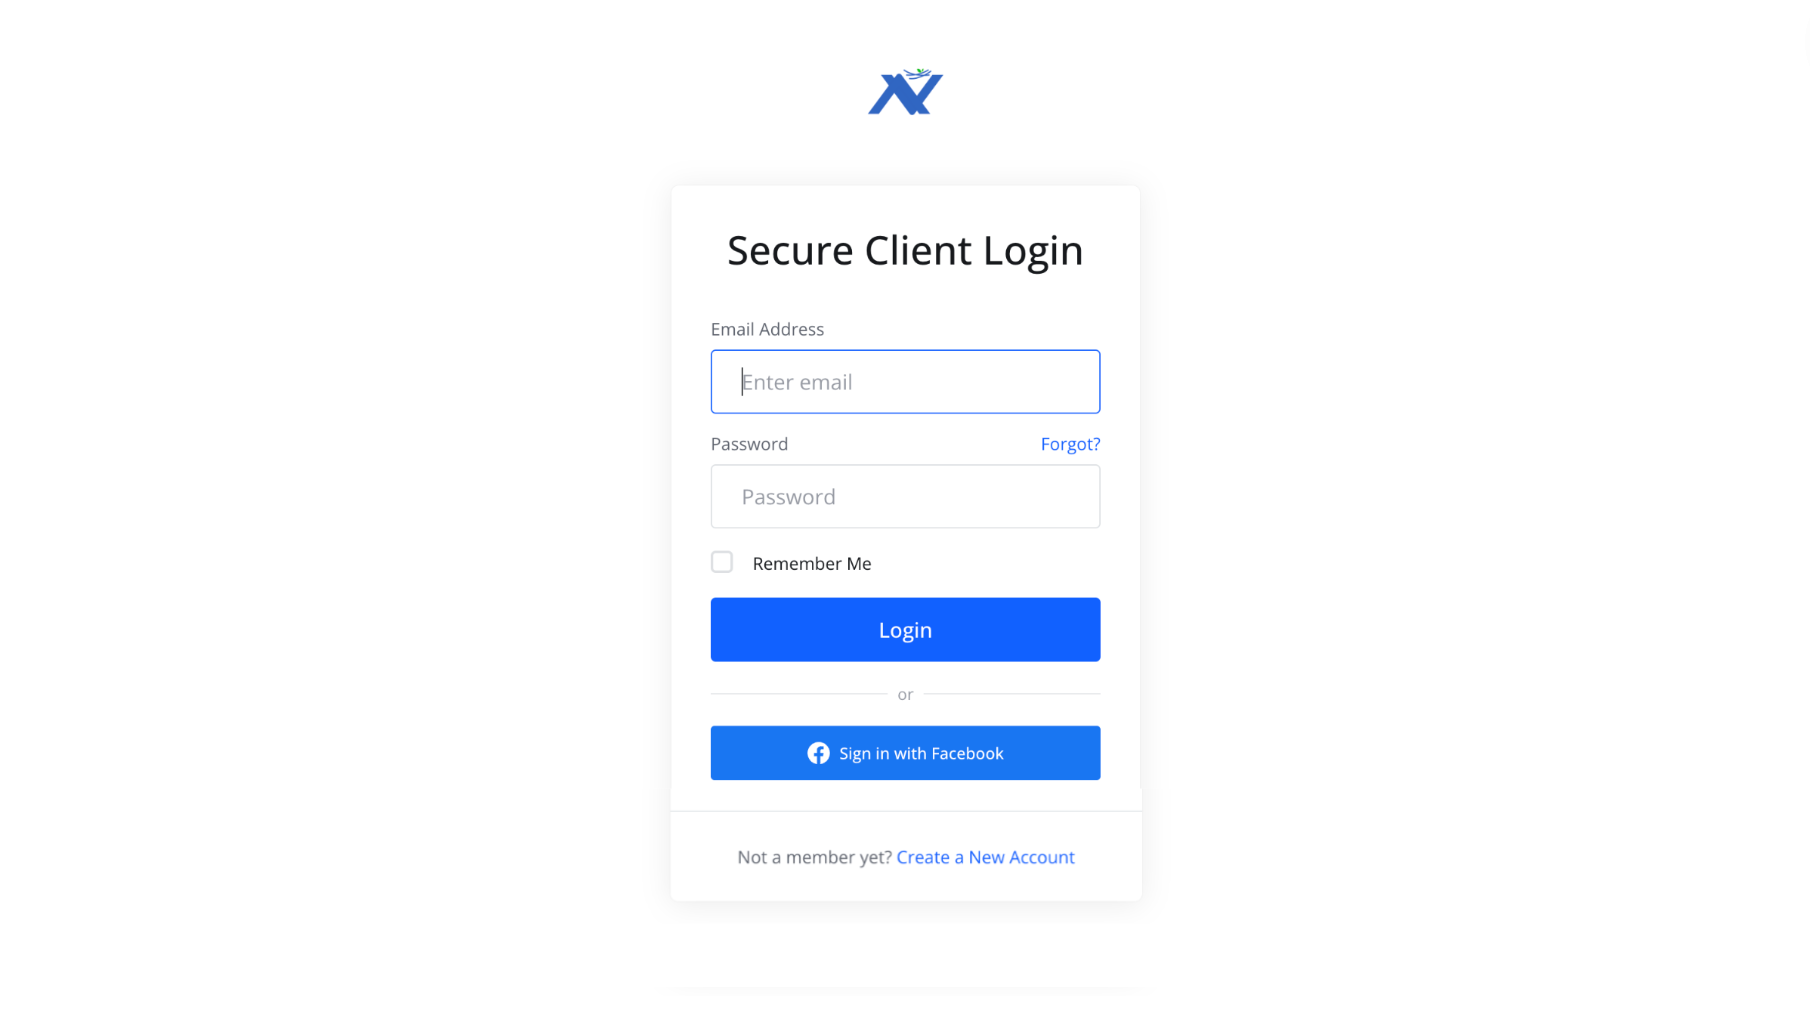
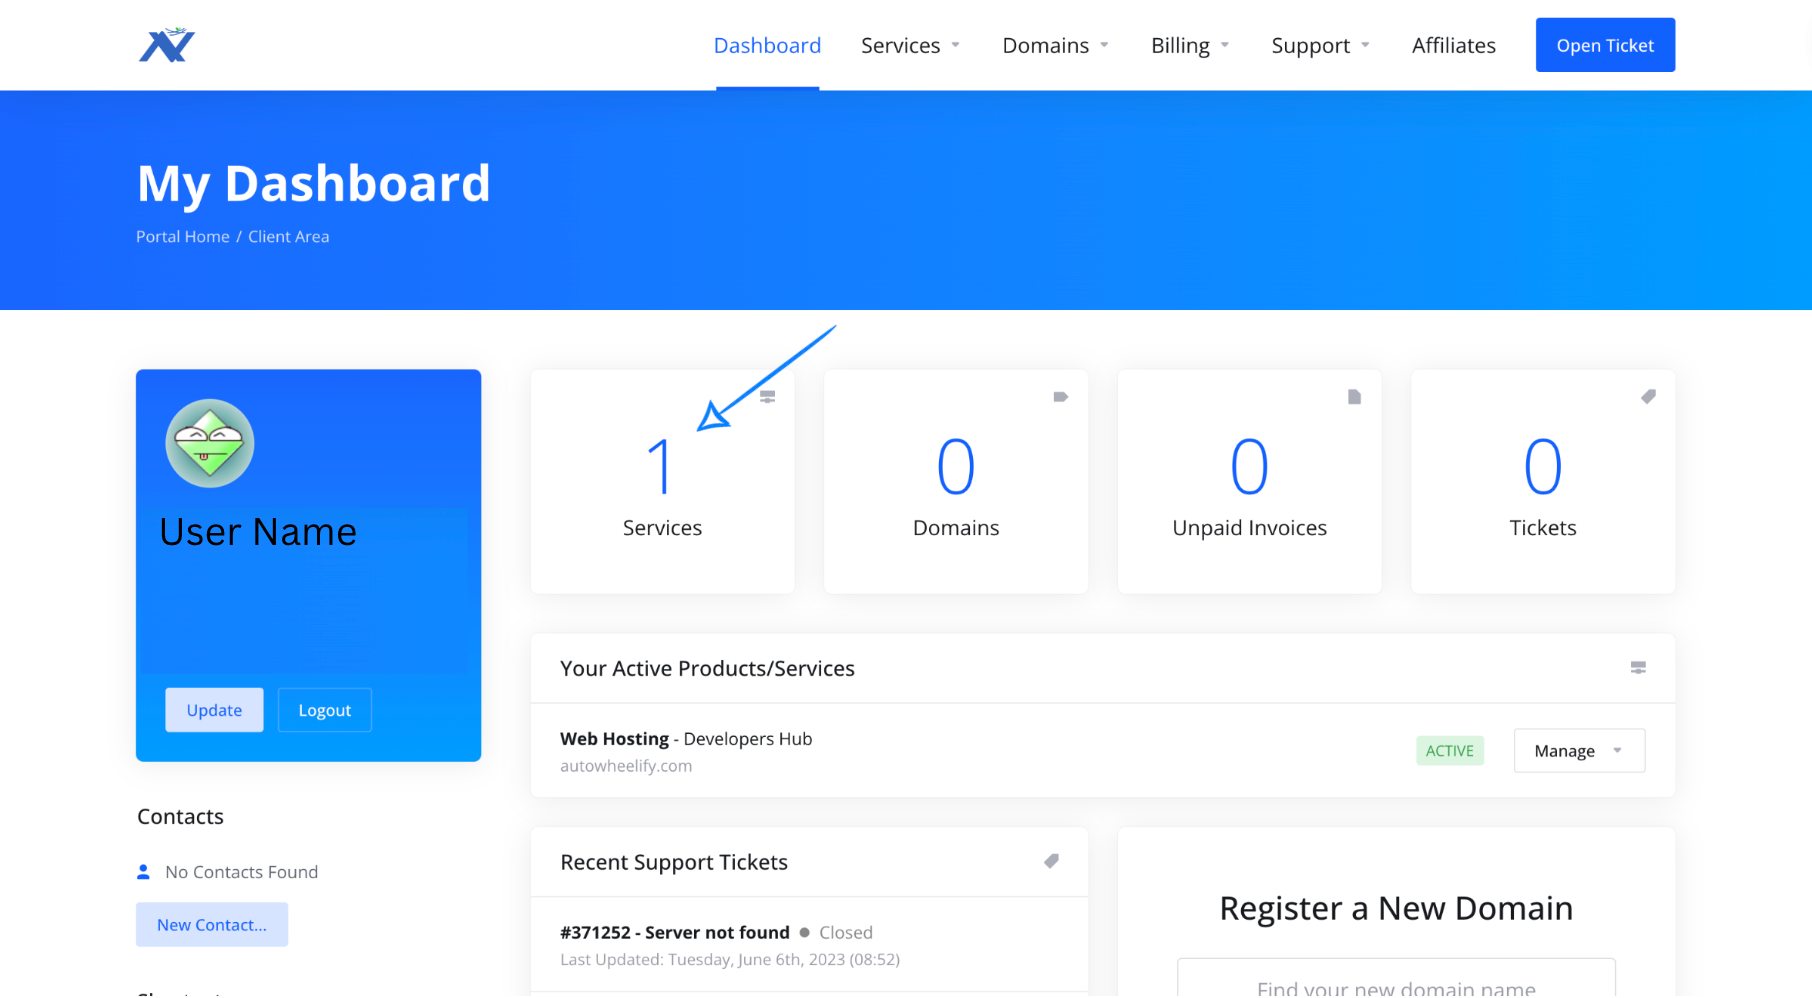
- First of all login to Nest Nepal Client Dashboard.
- Now click on your service
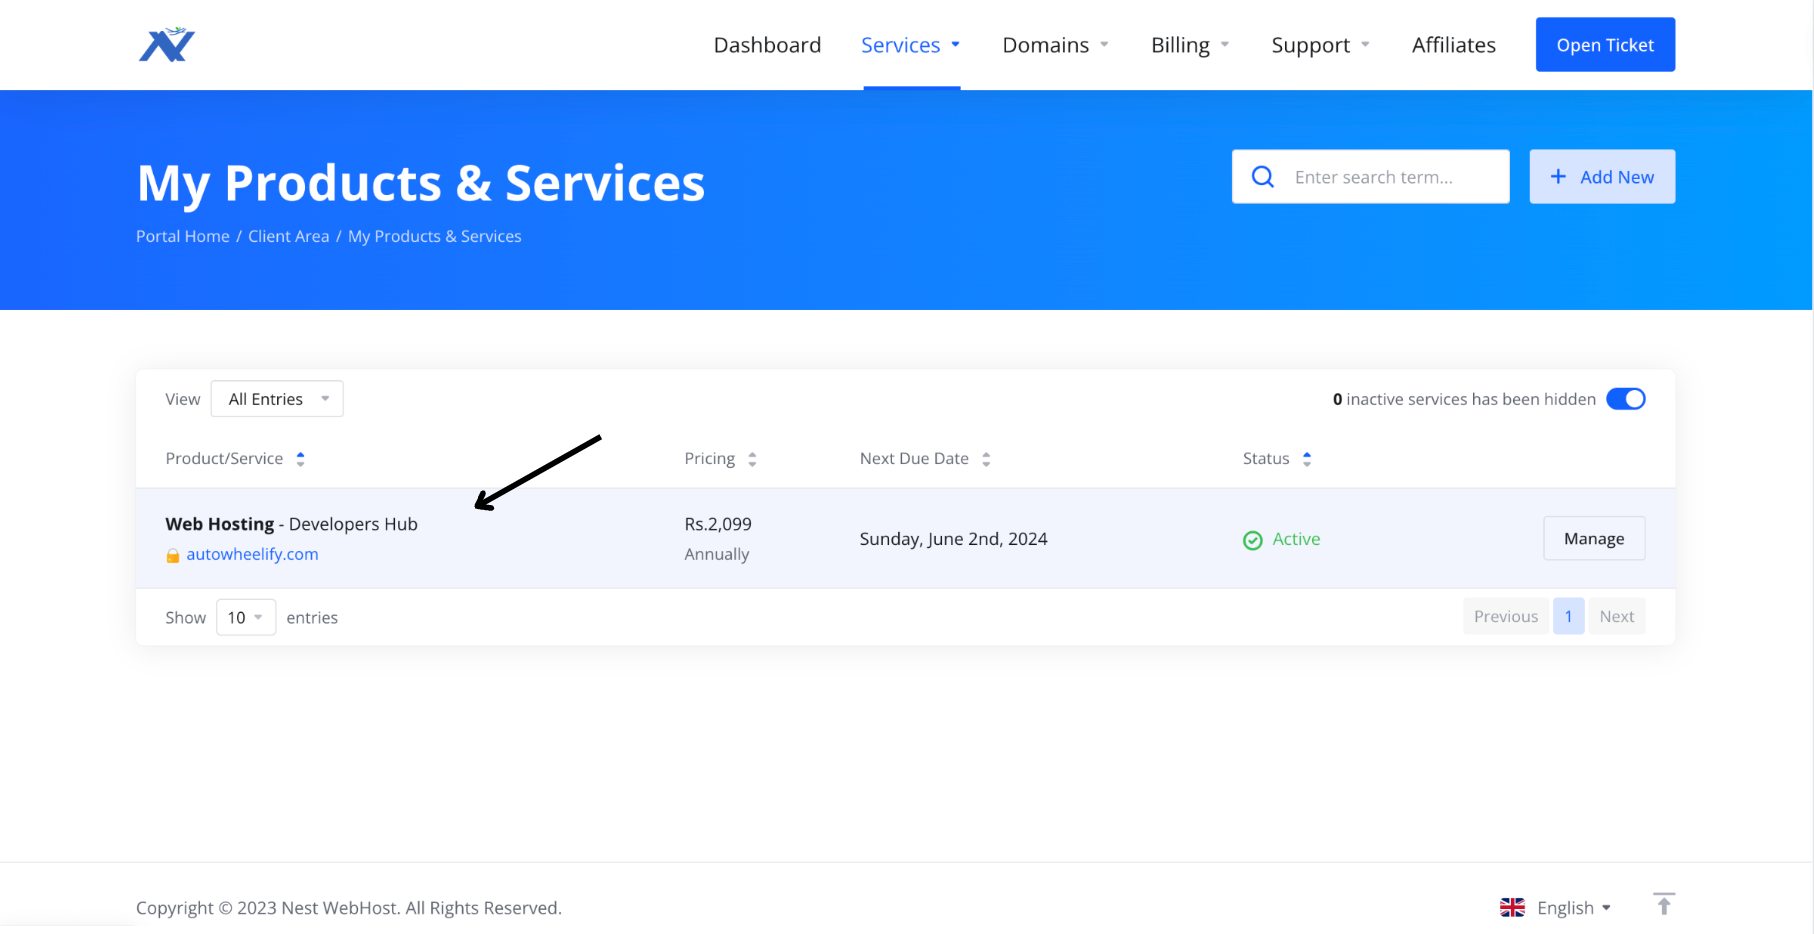
- Now click on any service in which cPanel you wants to login.
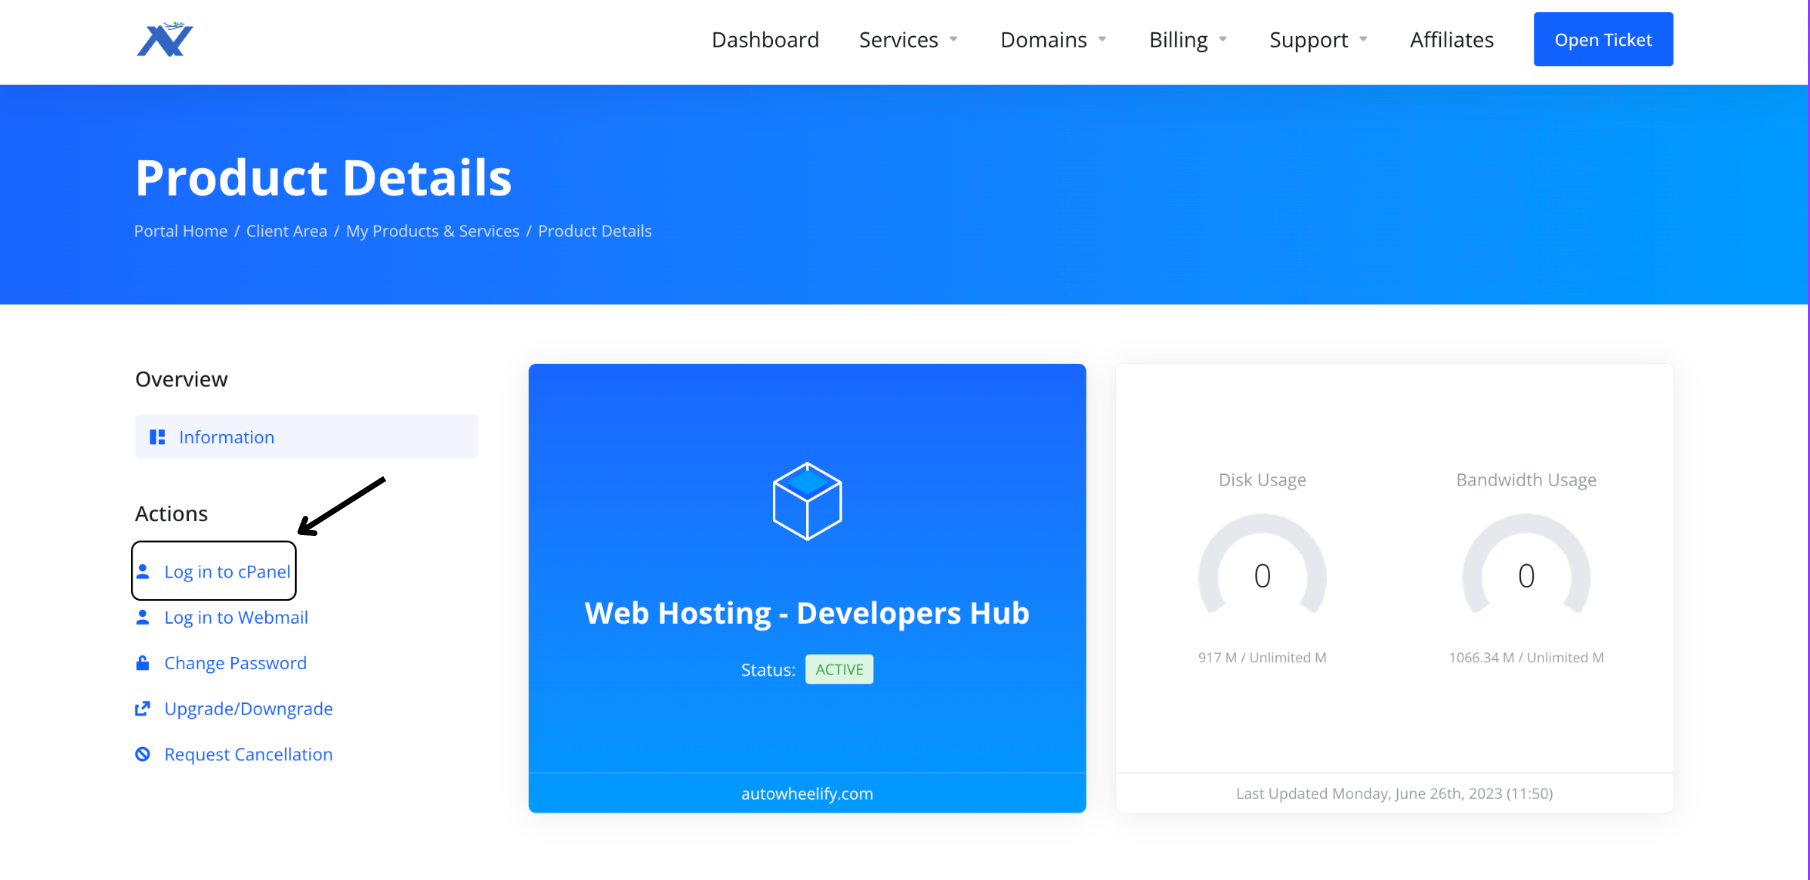
- Now click on Login to cPanel
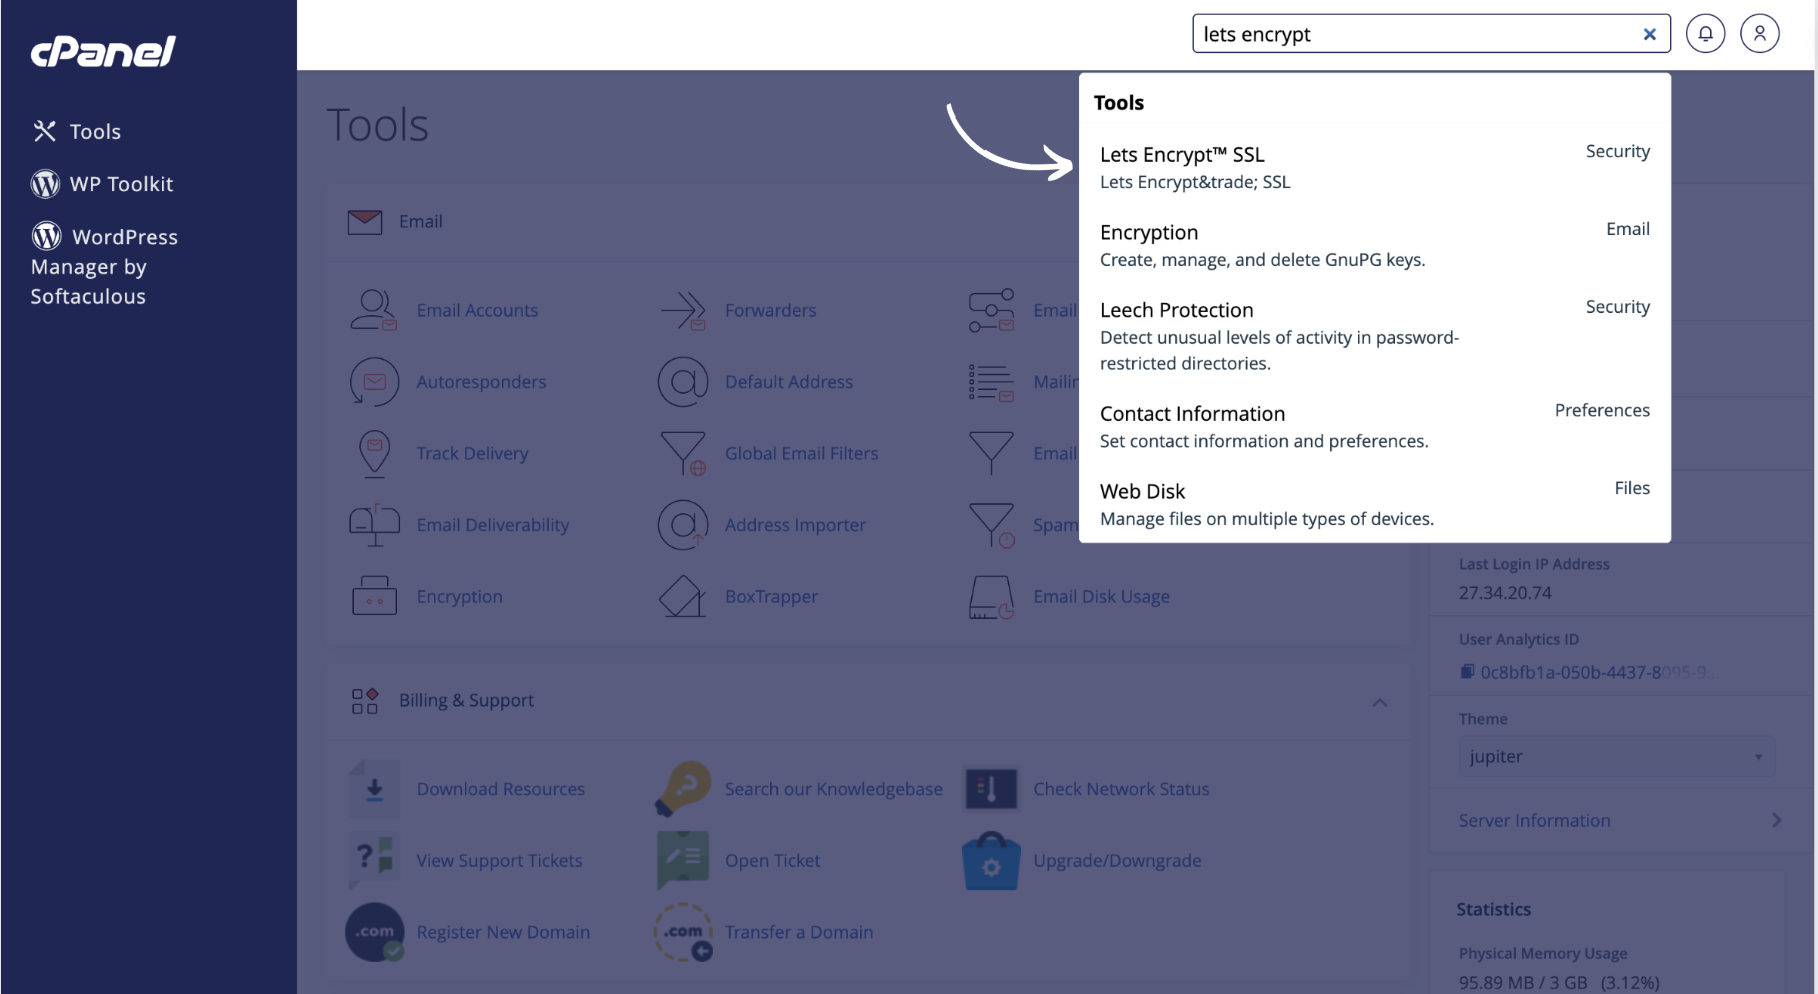
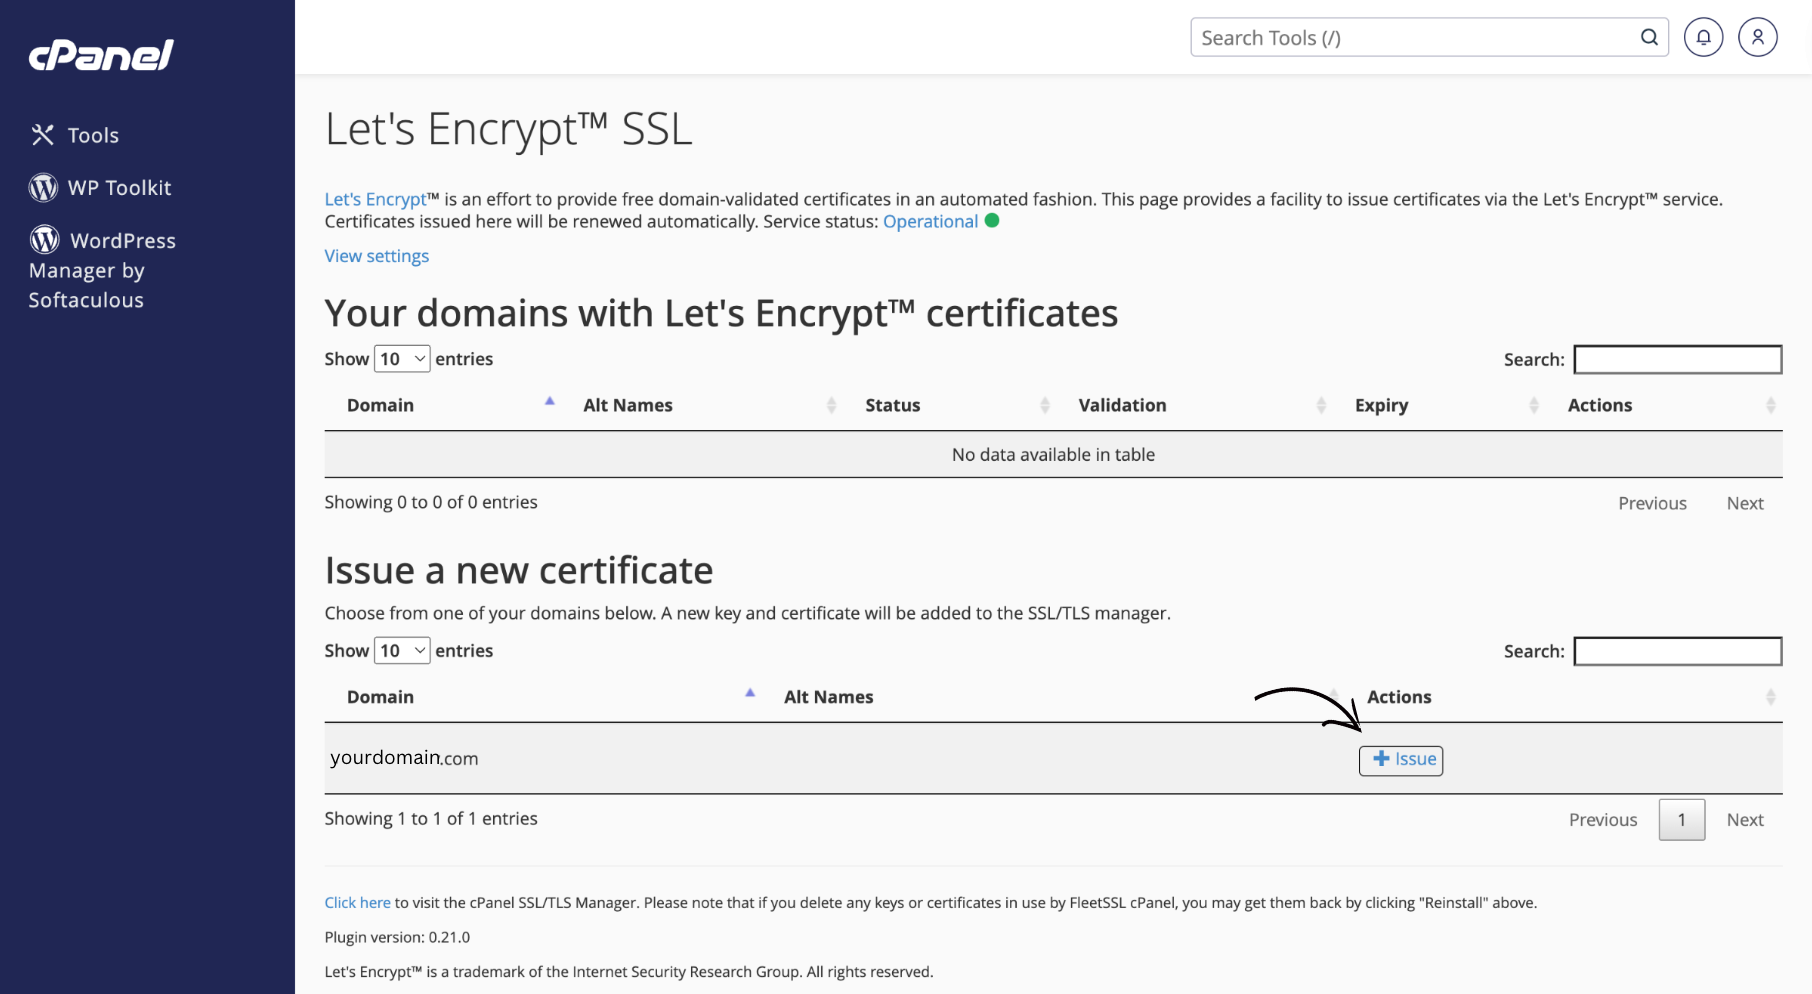
- Once you login to your cPanel, search for “lets encrypt”
- Now click on the “issue” in the right side of the domain in which you want to install “SSL”
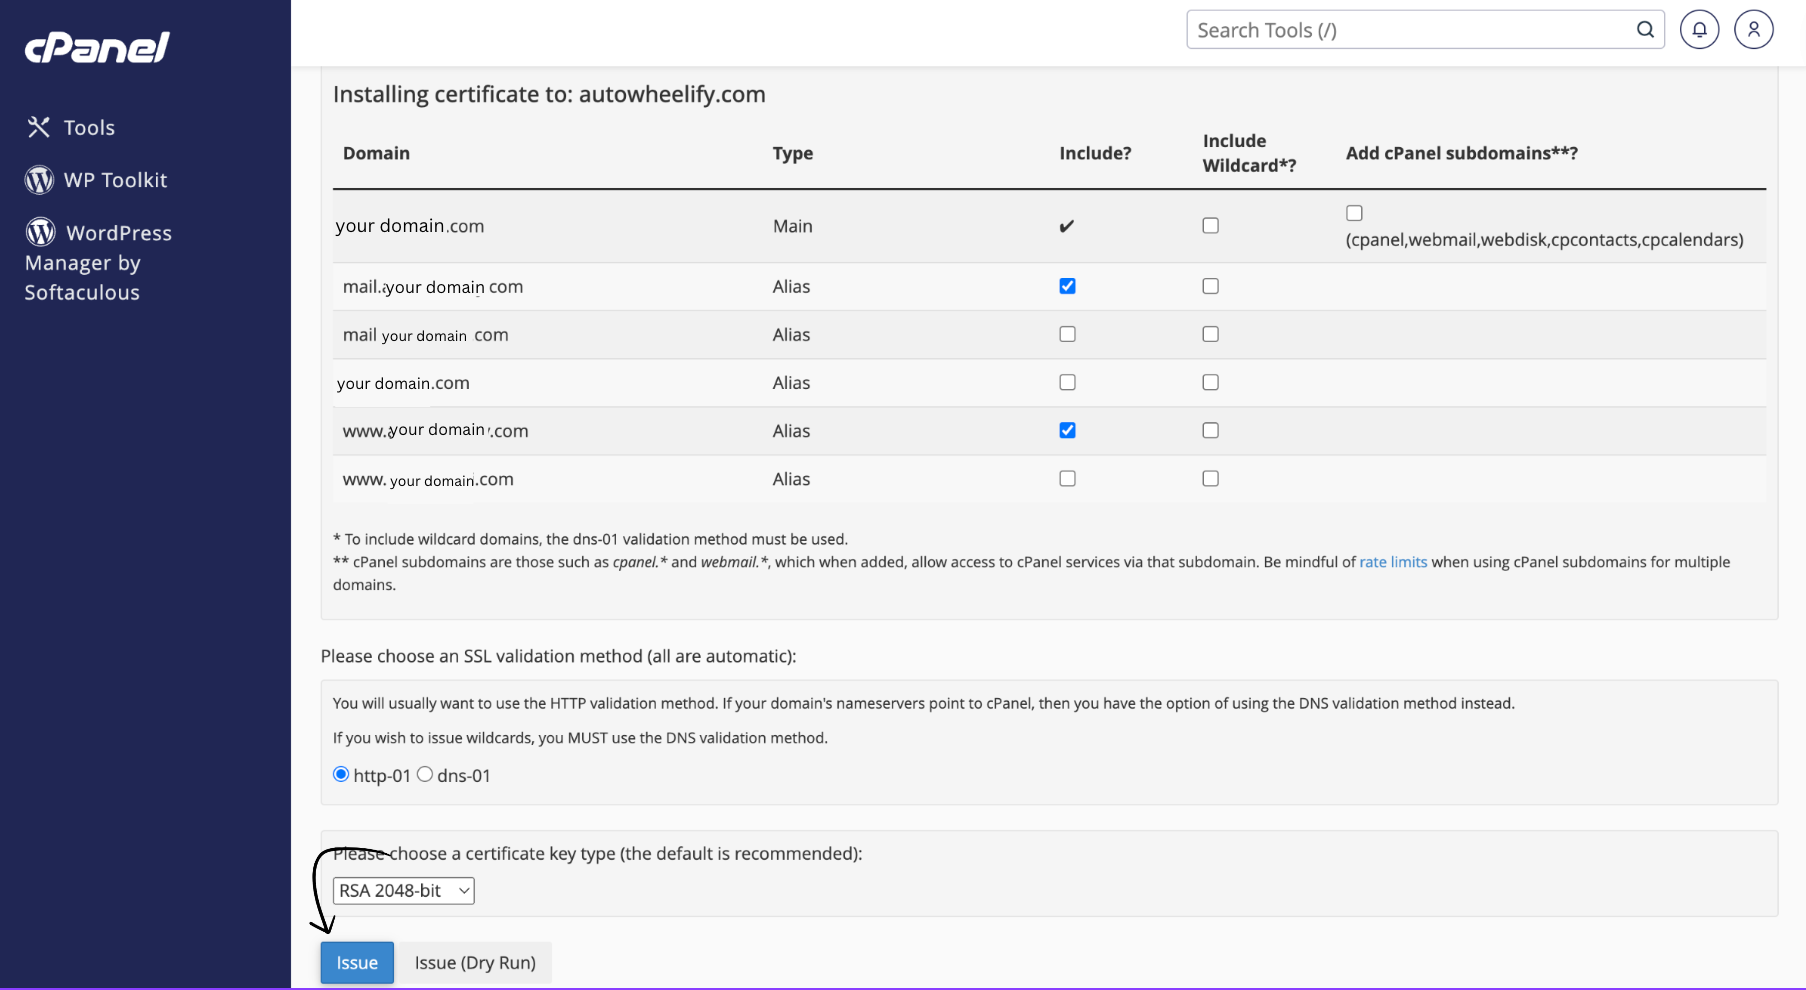
- Now finally click on this “Issue” button to complete the process.
Now open your incognito tab and then type your domain name and hit enter and check whether the ssl has installed or not.
I guess it is already installed if it’s not then you can always contact our support agent to help you out.
Get Your Hosting From: Best Web Hosting in Nepal
You can also Contact us on Facebook: https://facebook.com/nestnepalofficial.
Frequently Asked Questions(FAQ)
What is Let’s Encrypt?
Let’s Encrypt is a free and open certificate authority that issues SSL certificates to allow for safe HTTPS communications.
Why do I enable SSL on my website?
Enabling SSL guarantees encrypted connection between your website and visitors, improving security and safeguarding sensitive data.
Are there any requirements for enabling Let’s Encrypt SSL?
You must have a valid domain name and access to your hosting provider’s cPanel.
How long does it take to enable SSL using Let’s Encrypt in cPanel?
It normally just takes a few minutes, and once completed, your website will be accessible through HTTPS with a valid SSL certificate.